Now that I've done all this lovely work on my Spengler wand (ok not THAT much, just the silver tip and the pushbutton), my 84 Wand arrived, of course. 
Time to start the REAL mods. Mega update, coming your way!
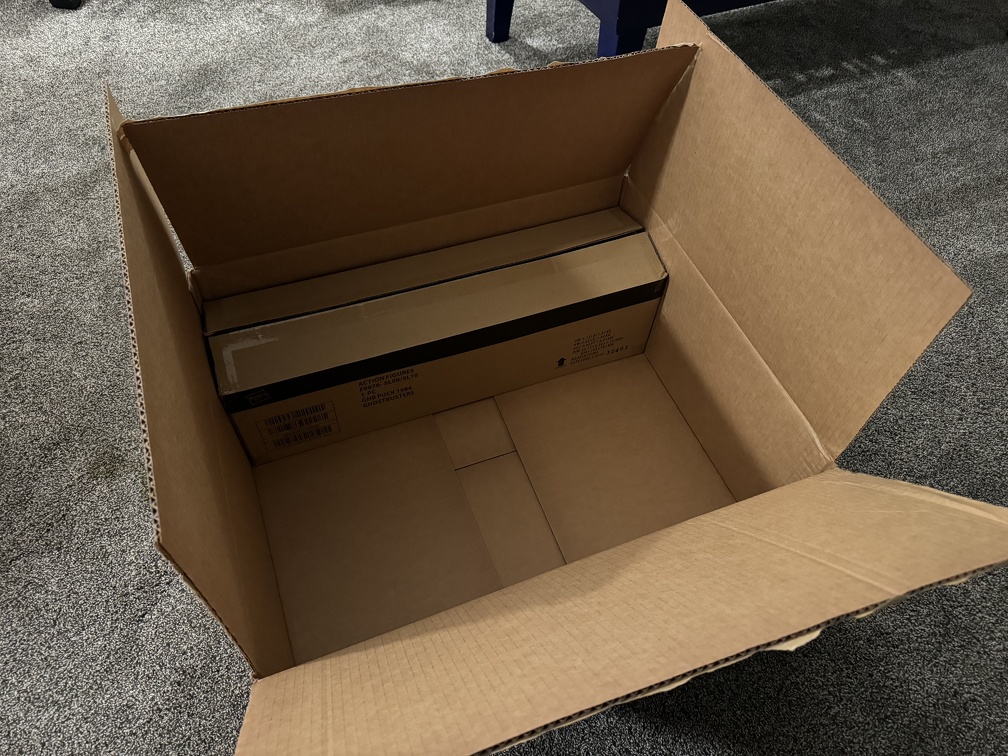
Hats off to Hasbro for having the cajones to ship the 84 wand inside a MUCH larger box, with the tape slit open (on the inner wand box, that is) and without a lick of padding inside the box. WTAF. Fortunately, everything seemed intact inside.
![Image]()
First, a couple shots of stock wand, for posterity:
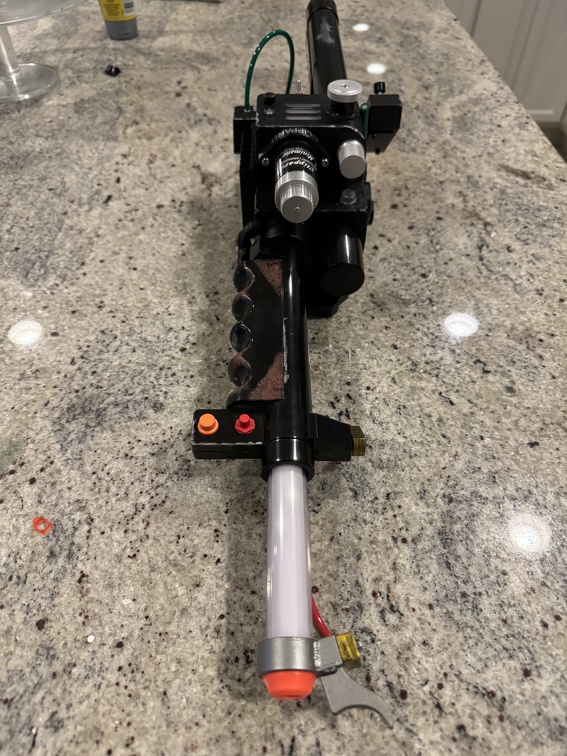
Front:
![Image]()
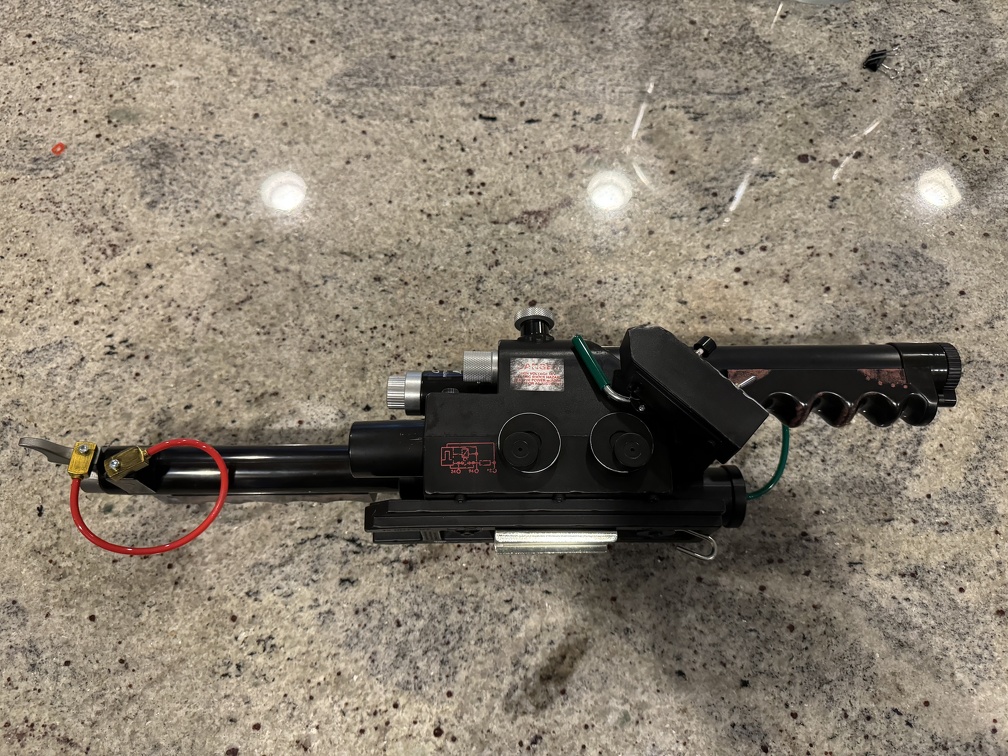
Left Side:
![Image]()
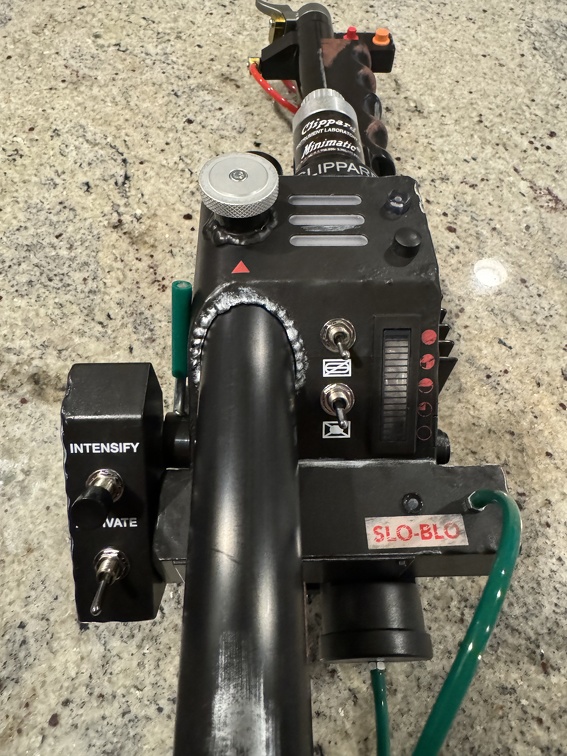
Back:
![Image]()
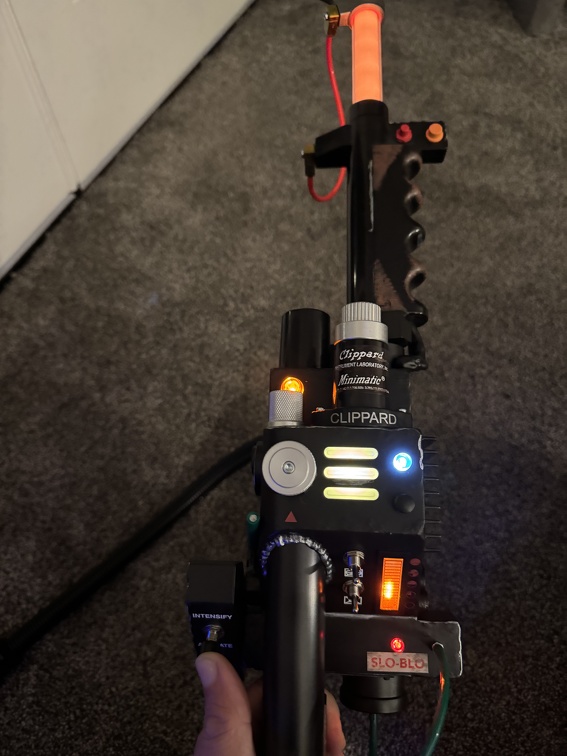
Firing:
![Image]()
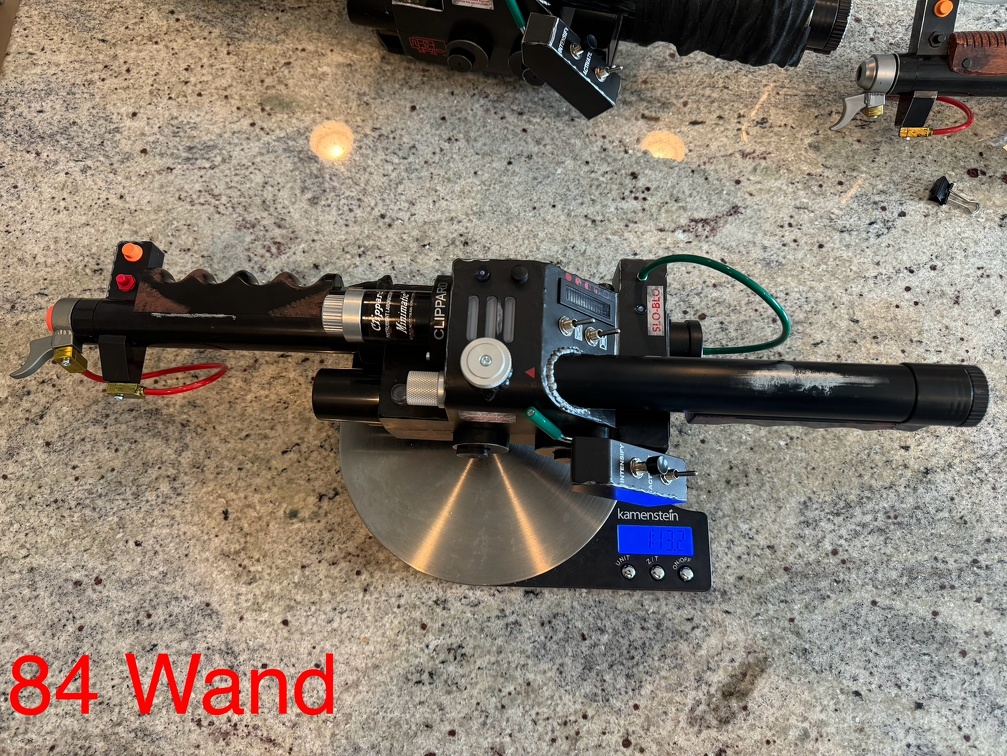
And some wand weight comparisons, since I posted this on FB and goodness knows that'll be impossible to find in 2 months (and not everyone is on FB):
84 Wand [100% stock]: 1 lb 13.2 oz
![Image]()
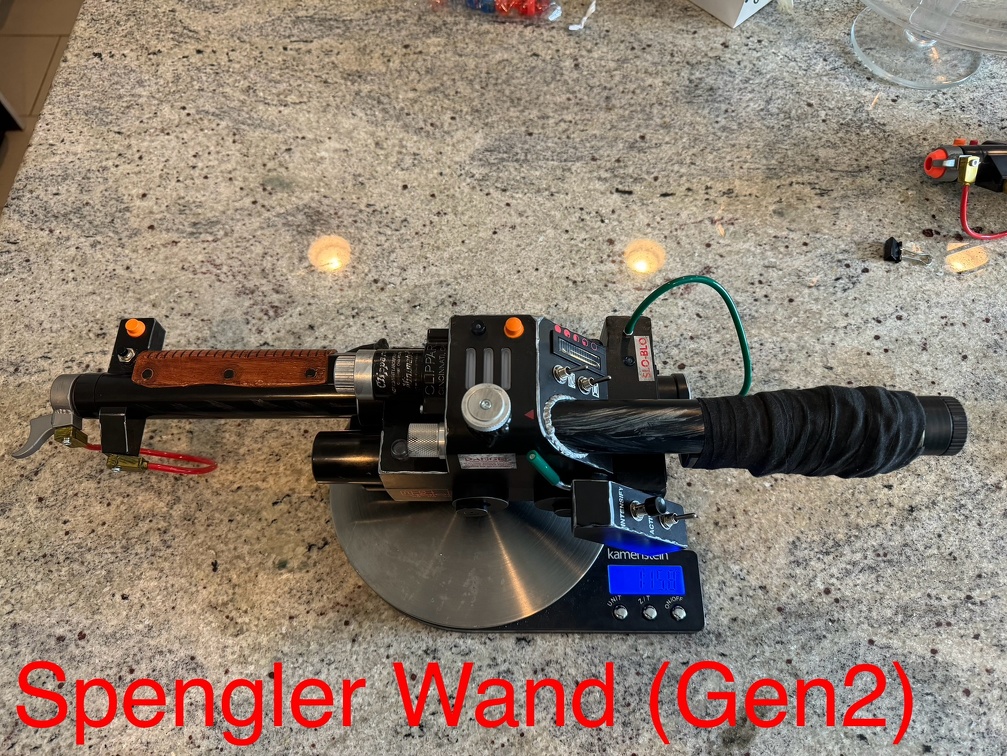
Spengler Wand (Gen 2 Orange Tip) [Mods: handle tape wrap, orange tip cutoff, 1 real pushbutton]: 1 lb 15.8 oz
![Image]()
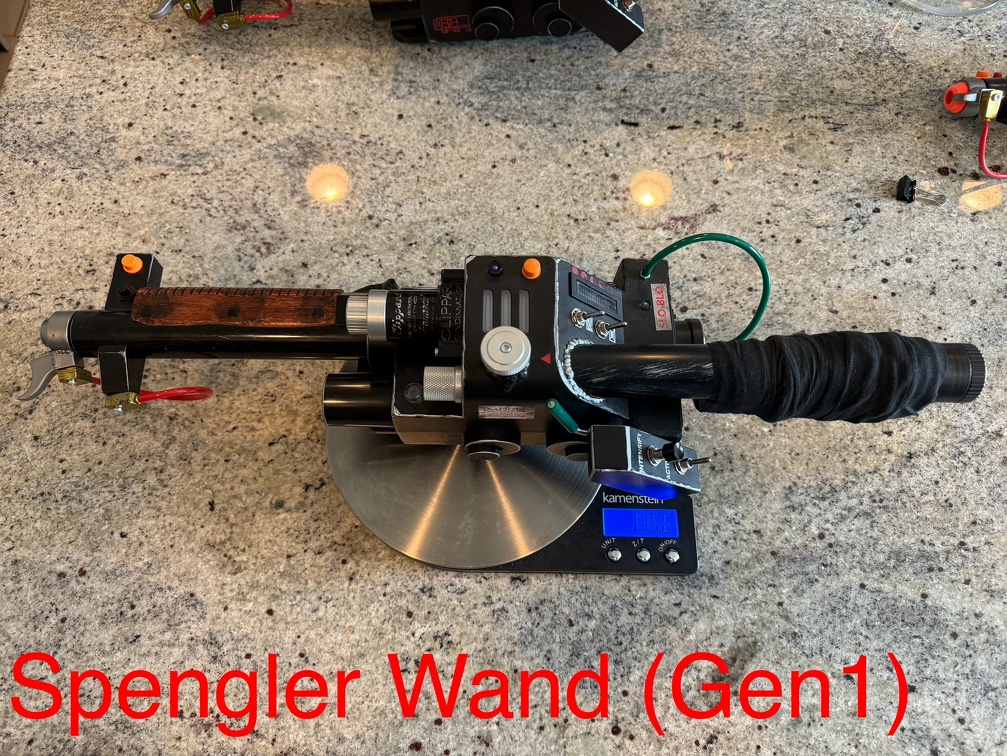
Spengler Wand (Gen 1 Silver tip) [Mods: handle tape wrap]: 1 lb 15.6 oz
![Image]()
NO BATTERIES inside any of those, just the empty sleds.
I honestly suspect the 0.2 oz difference between the Spengler wands was mostly due to (a) the added hockey tape wrap, and (b) a small difference due to the weight of the different grips. I doubt that switch weights enough to matter.
Note for other comparisons: Three AA Duracell batteries weighs 2.5 oz in case someone compares these numbers to someone else's, that includes battery weight.
Mod #1: Paint
Mod #1, if you can call it that, was removing the godawful weathering Hasbro put on these wands. I get what they were going for, but wow, they must have outsourced and used the lowest bidder for the weathering this round. The brown handle weathering is utterly non-realistic and poorly adhered... it literally wipes off with zero effort using a paper tower and some isopropyl alcohol. You don't even need to wipe it hard, it comes right off. I think this stuff would come off on its own with just hand sweat, so I'm glad I removed it. I'll repaint that at some point.
The silver paint is adhered better... you have to rub it moderately hard to remove it with the same paper tower and isopropyl alcohol. But WOW the silver paint job is even worse than the brown, and that's saying something. Some "wear" on the edges is fine, but then they literally have straight silver paint lines in random places that look NOTHING like wear. (There's a nice looking wear mark on the back of the handle that is screen printed on... that's actually pretty nice. But everything else is astonishingly bad, compared to previous weathering jobs Hasbro has done.). Still, not too difficult to remove. Or just paint right over, your call.
Before:
![Image]()
After:
![Image]()
Mod #2: Metal Discs
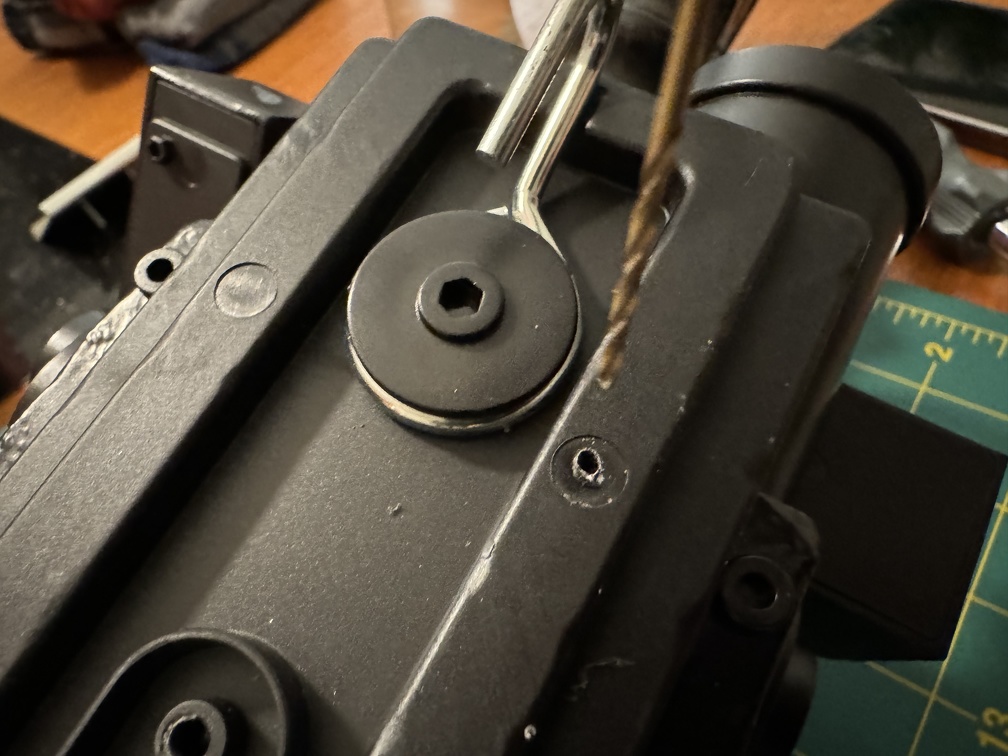
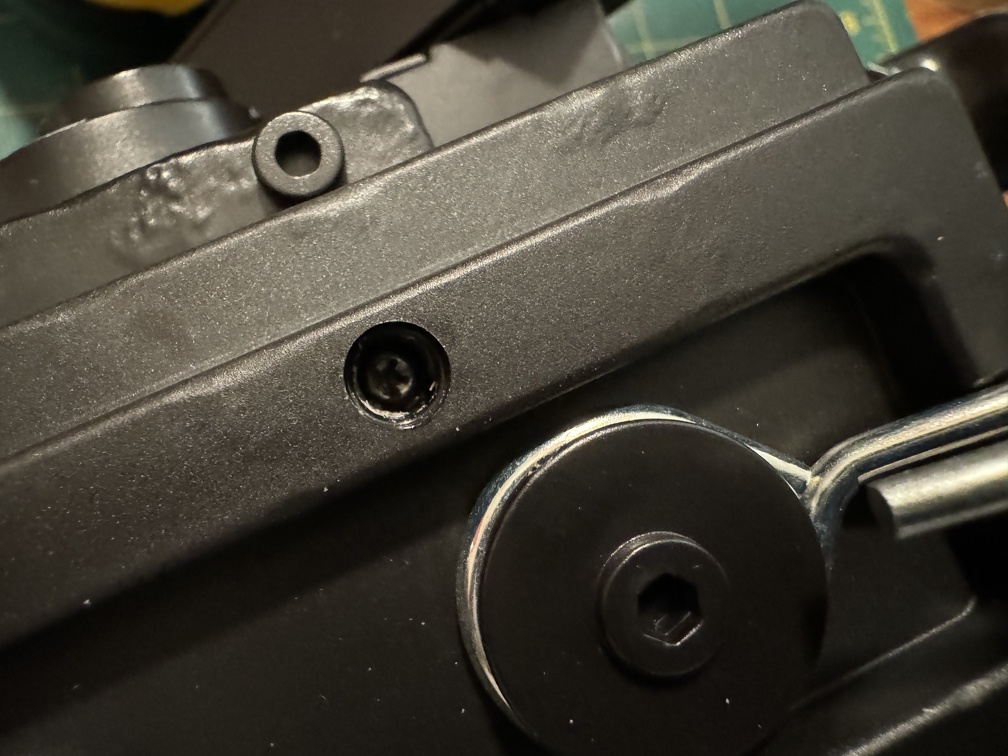
Next, it was finally time to get inside. As many others have noted, this just involves drilling holes into the 5 capped screw hole covers on the bottom of the rail, and either hooking out the plugs, or just drilling them out entirely (carefully, don't hit the screw that's 1/4" inside under that plug!), and unscrewing them to remove the rail.
![Image]()
![Image]()
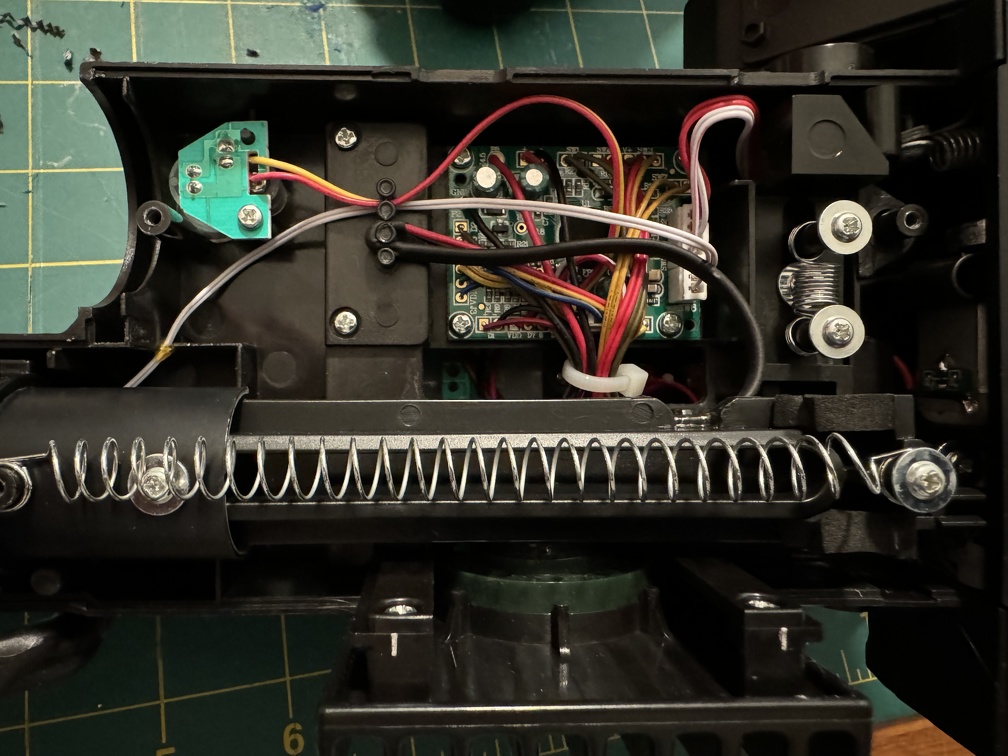
Then 4 screws (the barrel screw is way longer) and the bottom opens up, easy peasy, and you can finally see inside:
![Image]()
Now, one thing I forgot to document. There is a plastic plate underneath the barrel at the bottom of that pic, which keeps the wirey bits away from the slidey-slammy moving barrel bits. That gets cut away. Pretty simple, but you can't see it under the barrel in this pic, and I forgot to take a clear one with the barrel out of the way, showing the plastic, before and after I hacked it off with nippers. Plenty of videos on YT showing these teardowns if you want to see that happening.
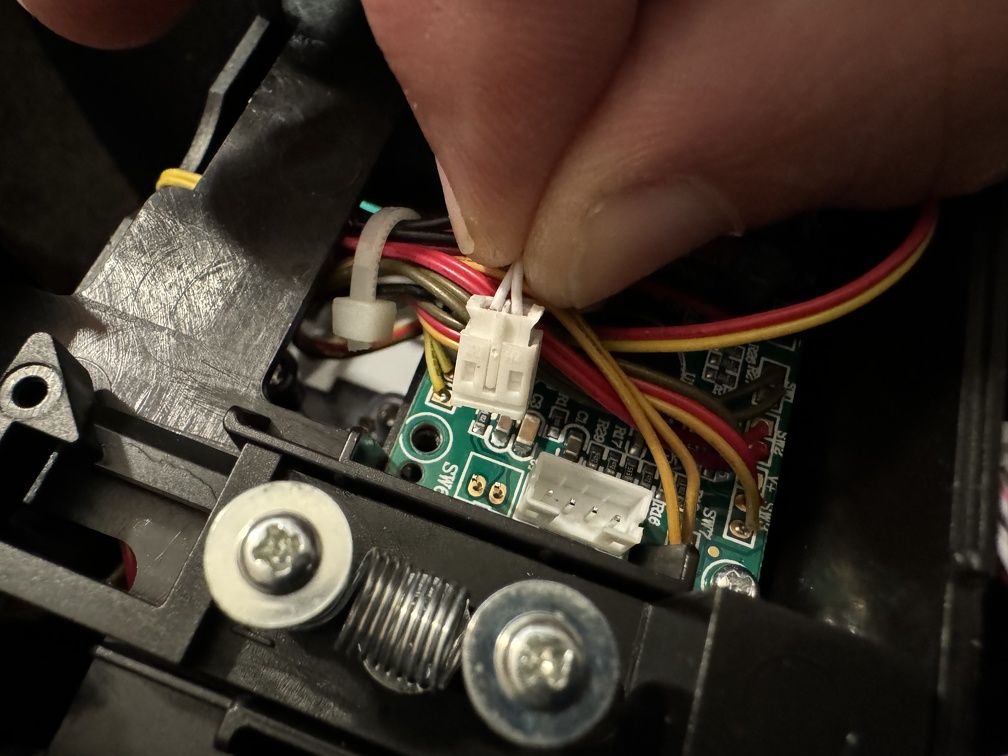
One bit of warning: I unscrewed the stock controller board to move things out of the way, and started unplugging the cables that are plugged into connectors on the PCB. No problem, but BE CAREFUL: When removing the two wire connector that goes up the barrel (I assume to the switch in the front ear, or maybe to the tip LEDs?) the WHOLE SOCKET lifted clean off the board with the connector itself. Thankfully I was able to carefully push it right back into place, and everything still worked. But use extreme care when unplugging things.
(btw you can see some of the plastic separation plate that I later hacked away here, ref to a couple paragraphs up)
![Image]()
Moving on.
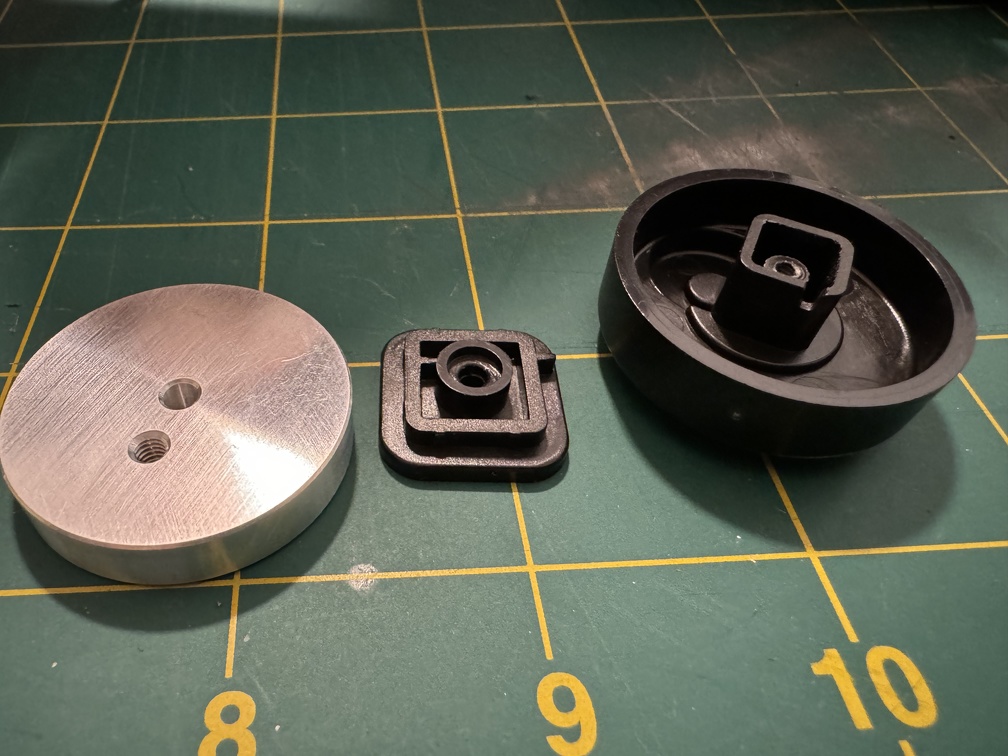
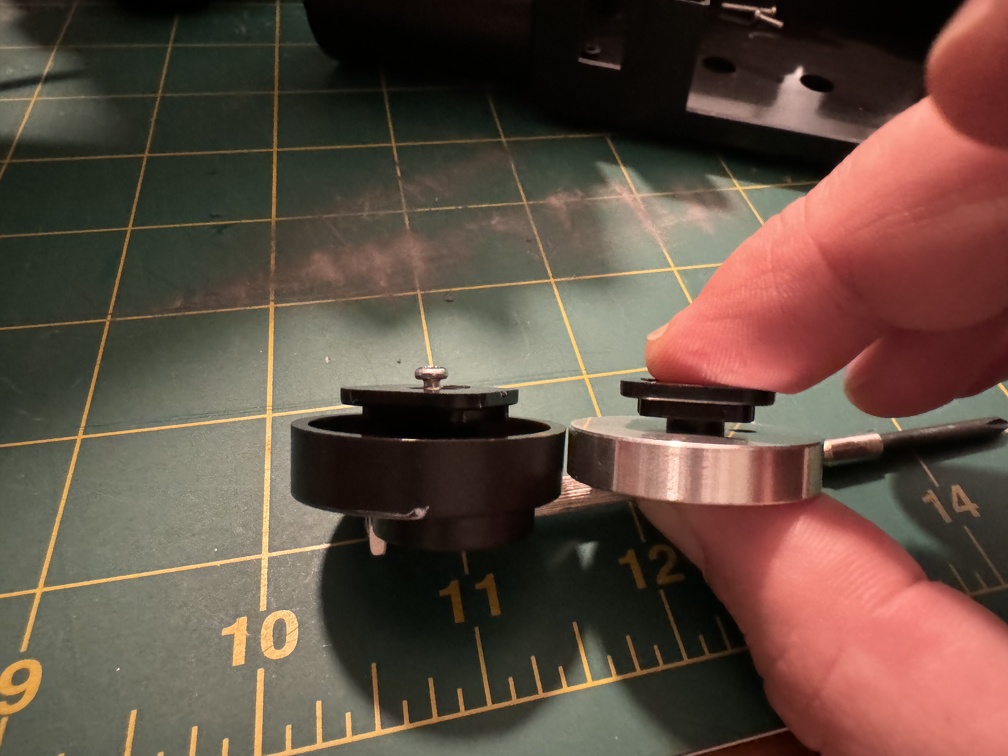
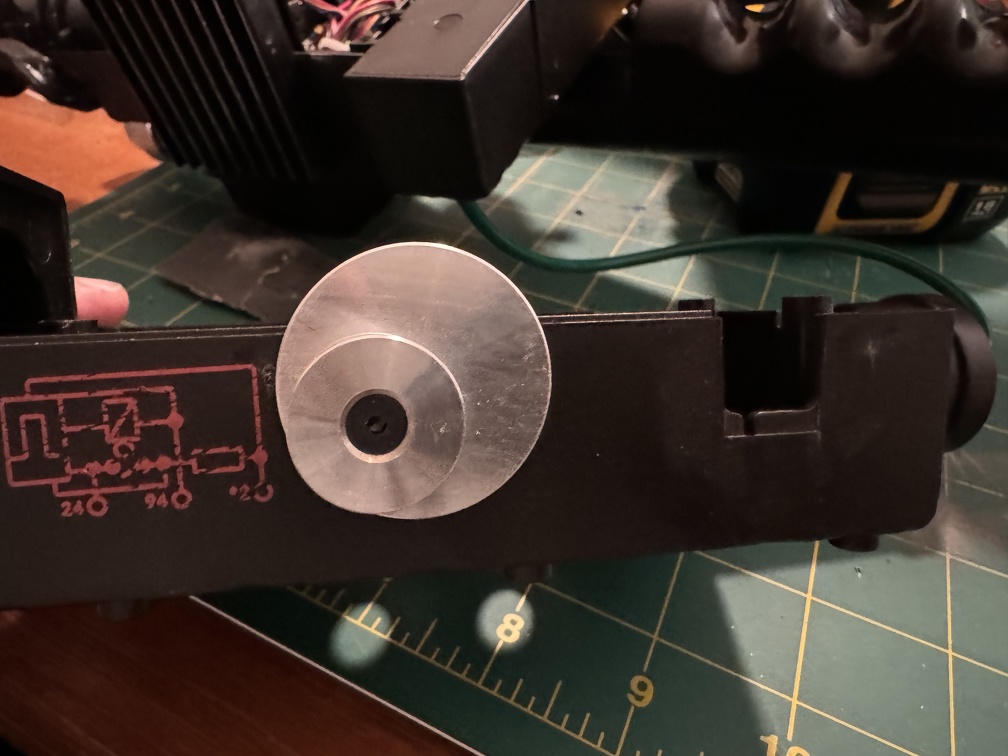
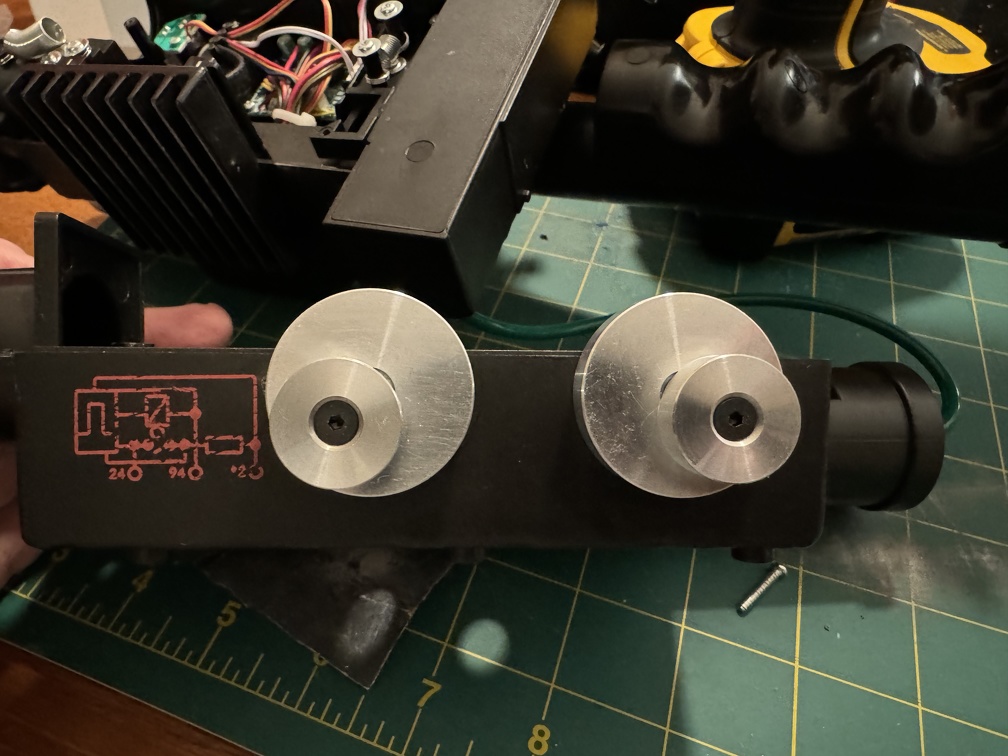
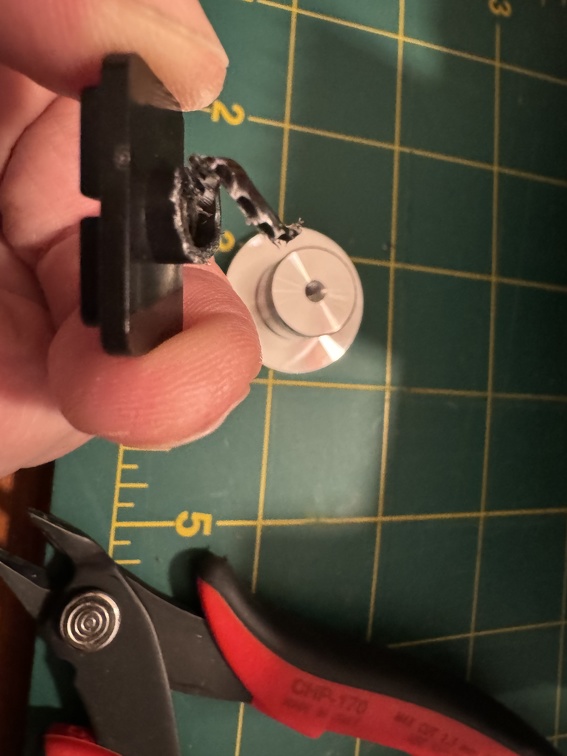
The two plastic side offset "knobs" are the first to go. VERY easy to replace, just unscrew the screw, and the disc/knob thing comes off the little plastic keyed tab that holds it in place. There's a plastic post that extends into the plastic knob a little bit which needs to be sanded flush, since it won't be extending into the metal disc, but then the metal part just screws onto the plastic tab, same as the original part did. Repeat for both of them, and you're done.
![Image]()
Plastic tab it too far from flush on the metal one:
![Image]()
![Image]()
![Image]()
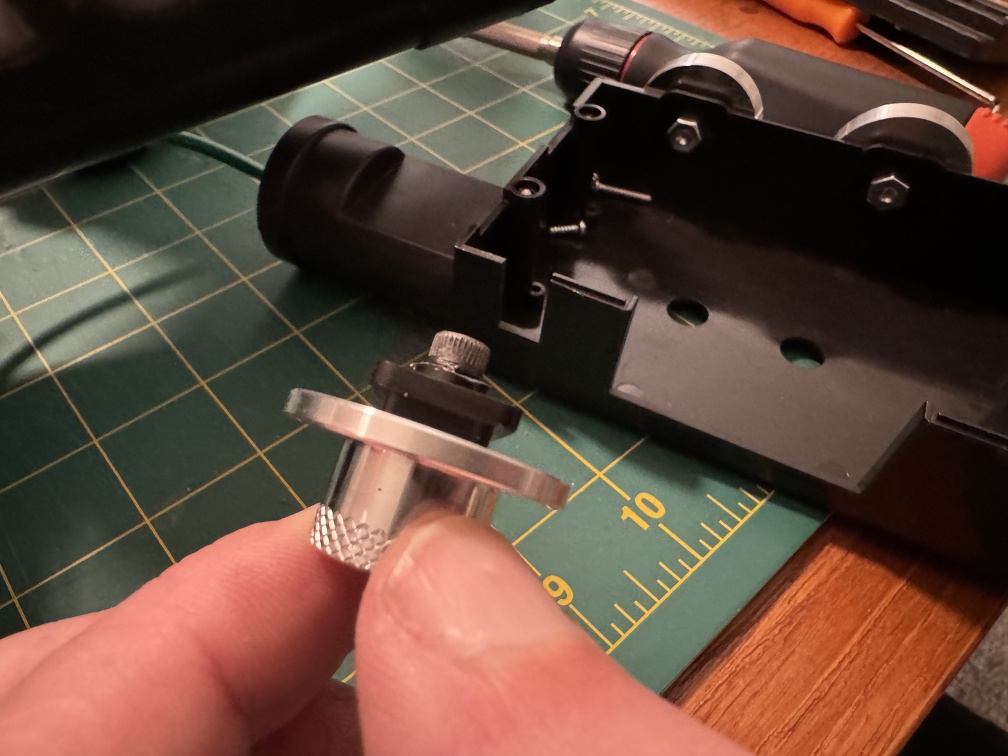
The knurled disc on the other side of the wand is mostly the same, except the too-long post extends the opposite direction for the GBFans-provided screw to reach. A quick snip around with my flush cut snips to take a little off the end, and it screwed right in perfectly.
![Image]()
![Image]()
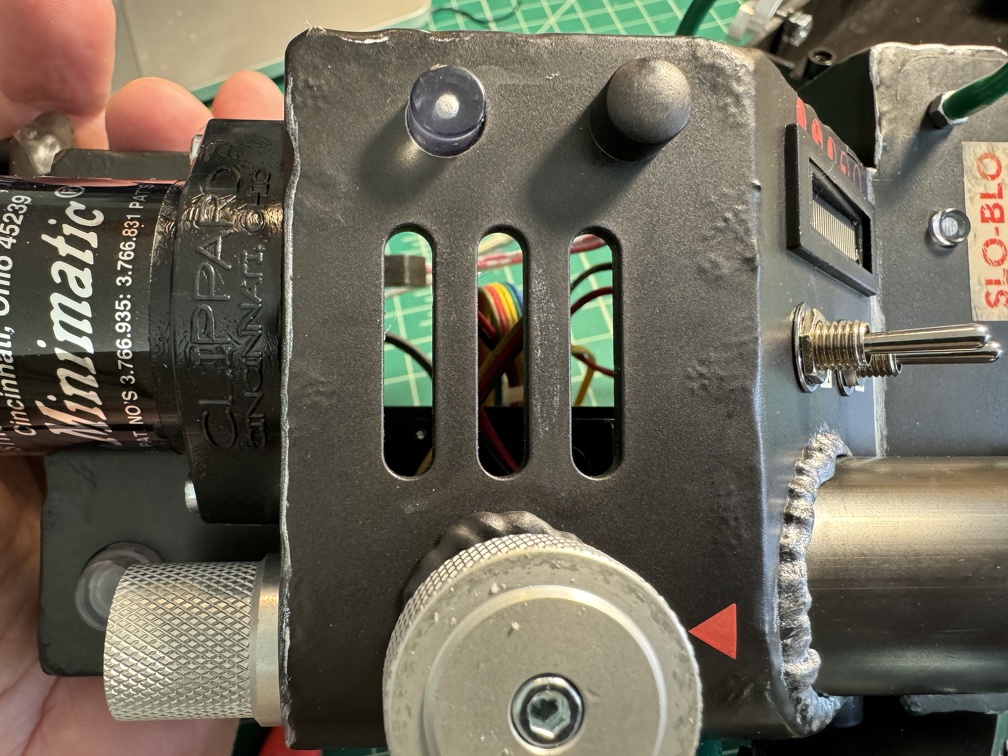
Mod #3: Clippard
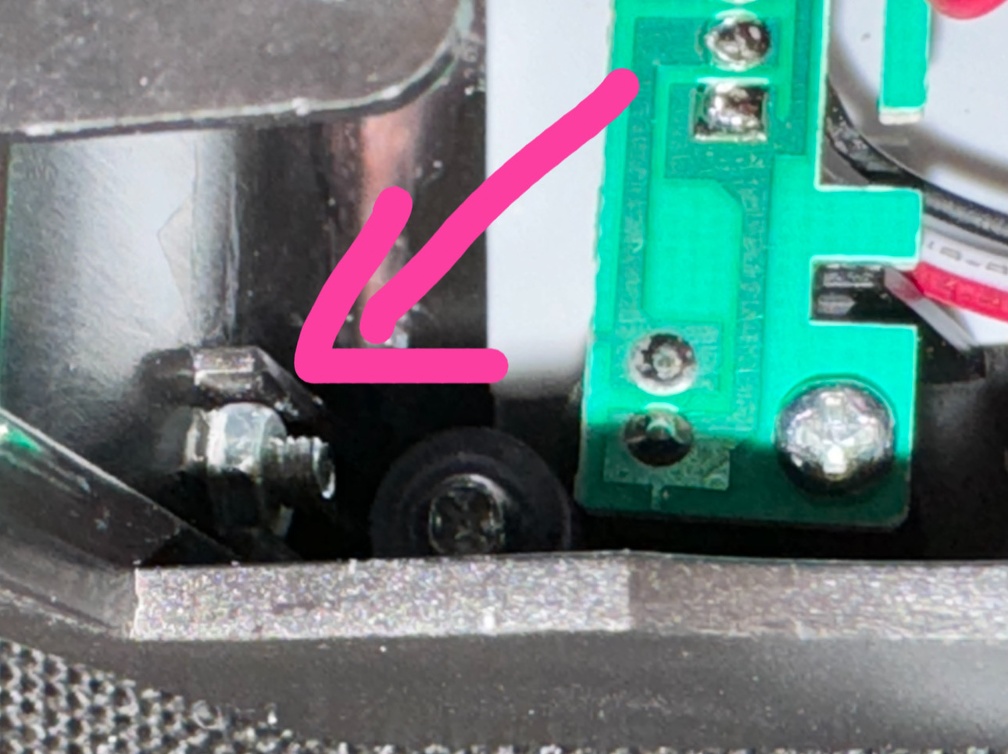
Next up, the real Clippard R-701 valve install. Awesomely, the main pair of holes in the fake valve base actually line up nicely with the real base! Of course, the real valve has a round protrusion out the bottom center, with a keyed ridge molded in. Not a big deal to drill a hole in the middle, and use a needle file to cut a slot for the little keyed part, and it goes right on. Note when you're unscrewing the OEM valve, the nuts inside are only loosely held in place. If you're careful, you can probably keep them in place, and just screw right back into the same nuts. If you push even a little too hard, you'll pop them off and have to fish around in the depth of the wand to pull them out. (Ask me how I know LOL) Still, not too hard to get the real thing screwed in, and secure held by nuts on the inside.
![Image]()
Note slot holding nut in place (somewhat):
![Image]()
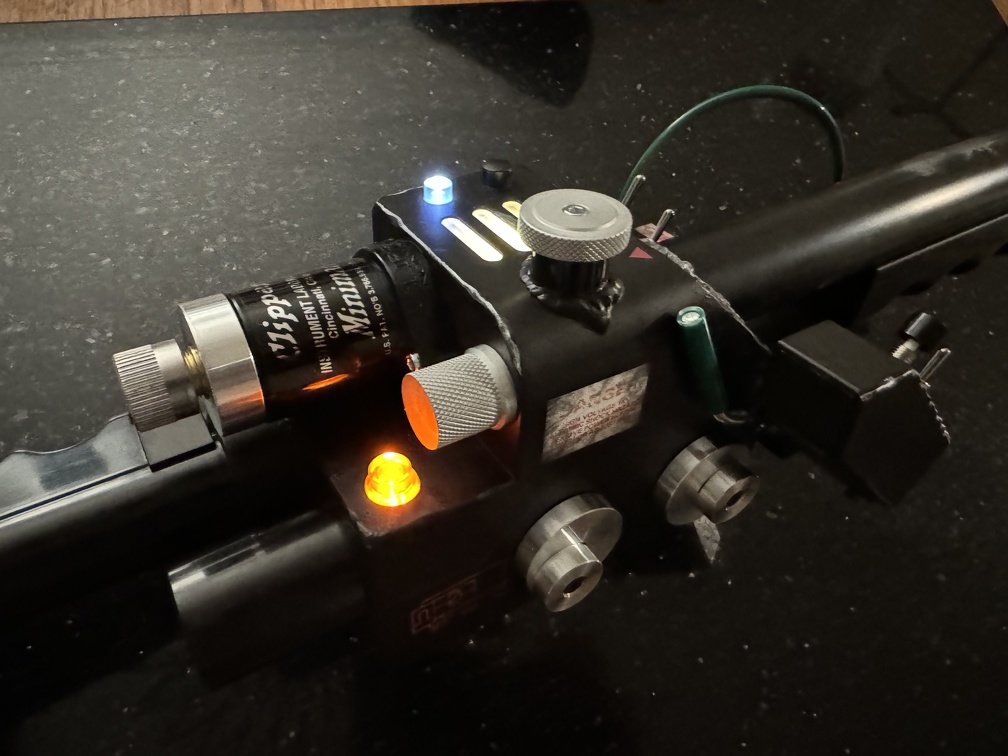
And that's done. SO PRETTY!!!
![Image]()
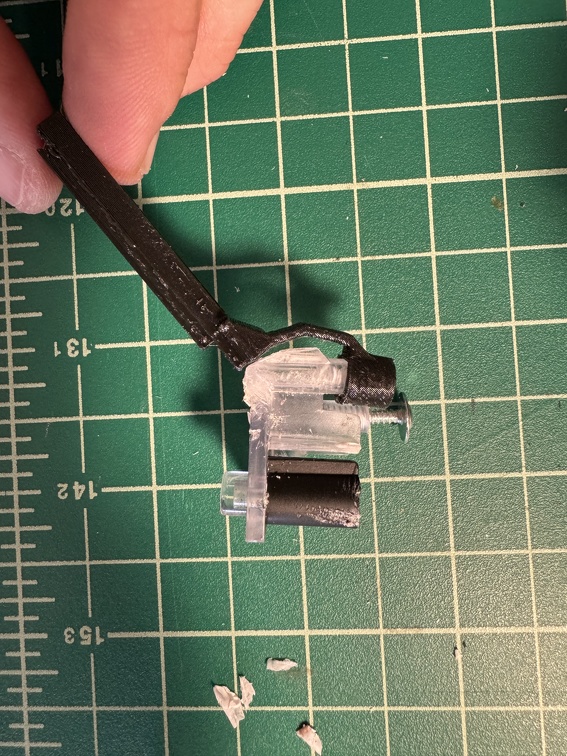
Mod #4: Frutto Tech Bargraph LED and Vent Hole Plate Removal
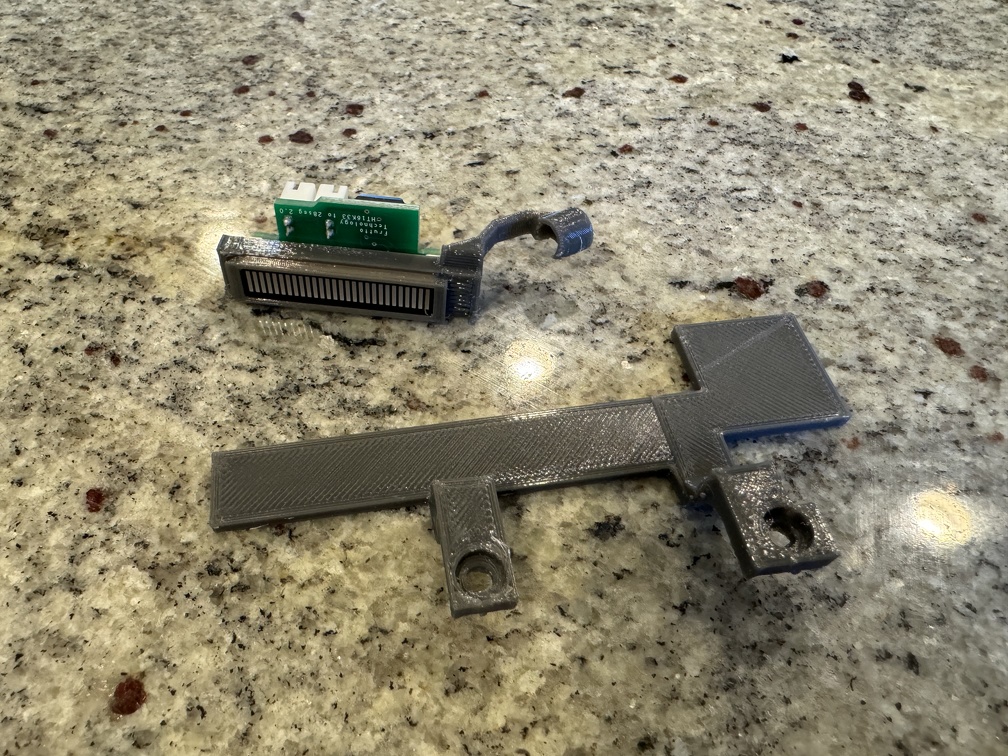
One of my most anticipated upgrades! I purchased Frutto's upgrade kit, and 3D printed the bracket as well as the replacement panel to protect the wiring from the wand extension mechanism.
(I just realized this pic was the first draft print of the LED bracket... the final bracket was from black PETG)
![Image]()
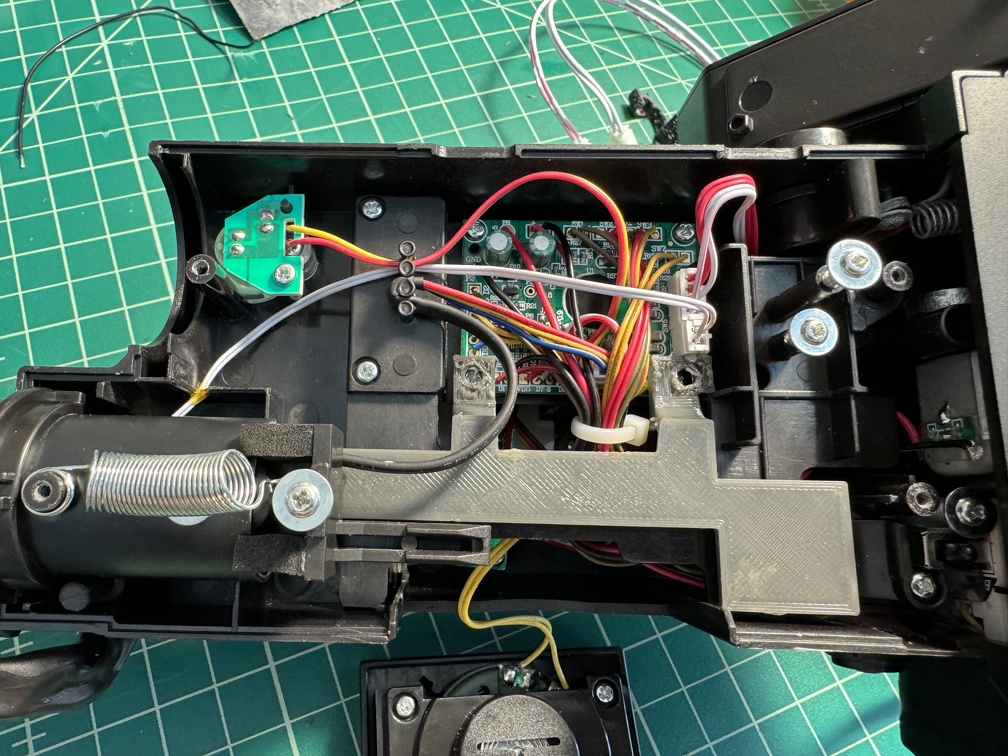
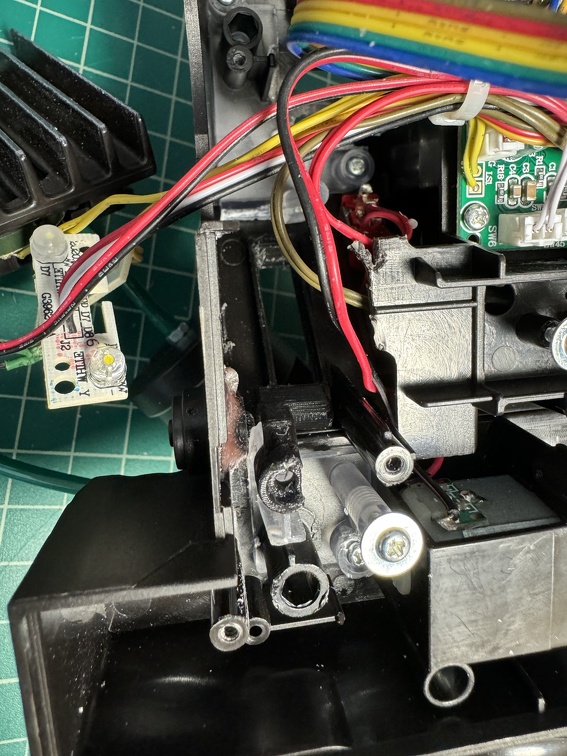
A quick test fit shows the plate seems to fit in there nicely, piggybacking off two of the mounting screws for the main board. (Release mechanism already removed, on the right side)
![Image]()
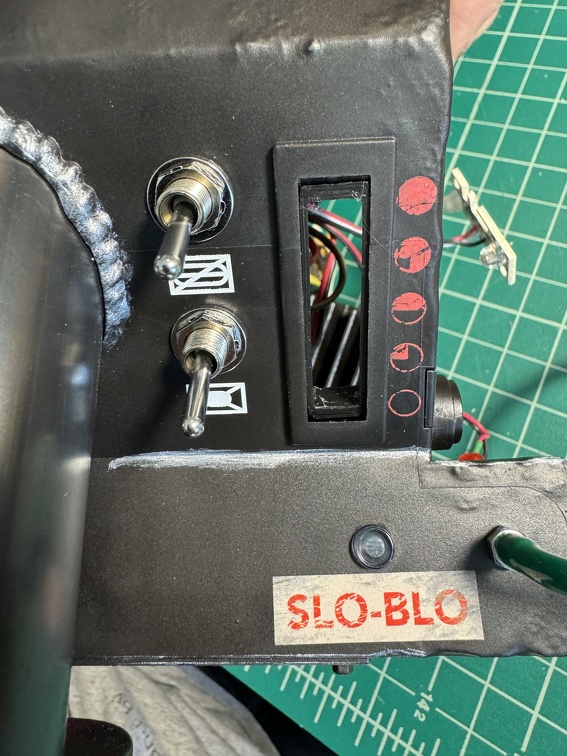
The bottom panel of the long rectangular box has to be opened as well, so the LEDs, switches, and top part of the whole bargraph/vent hole assembly can be accessed. (Side note, this is a good "after" shot showing what the interior looks like once that panel I mentioned above is trimmed away)
![Image]()
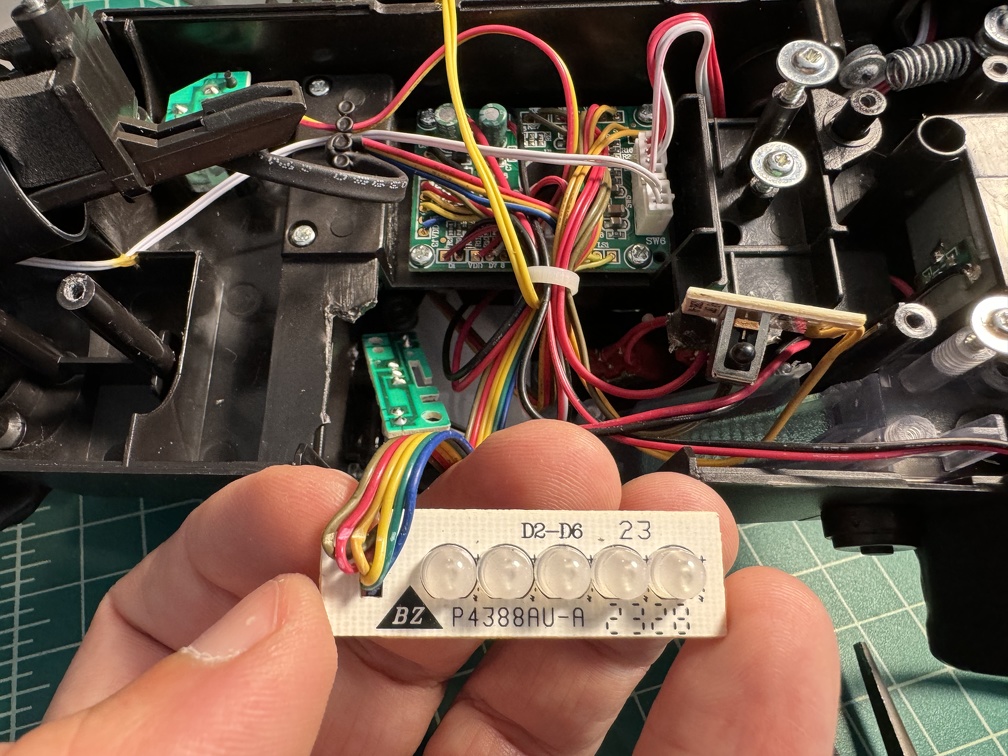
With the wand nicely laid open, popping the stock bargraph LED board out was straightforward. A little scary to cut through the wires going to that board... I wish they had used a connector!
![Image]()
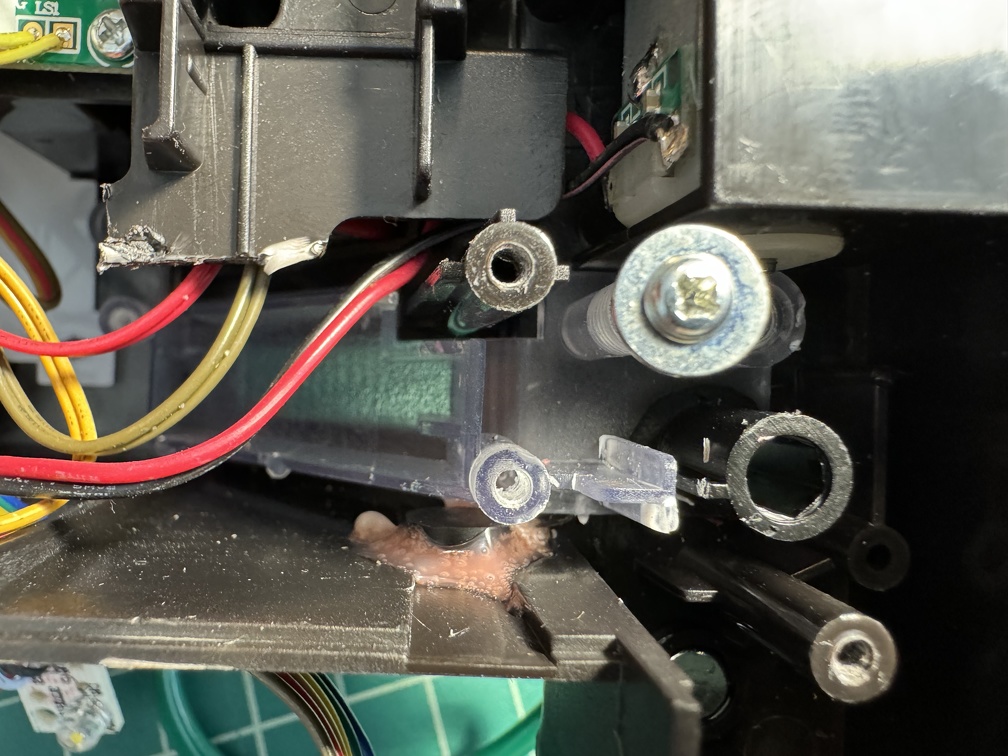
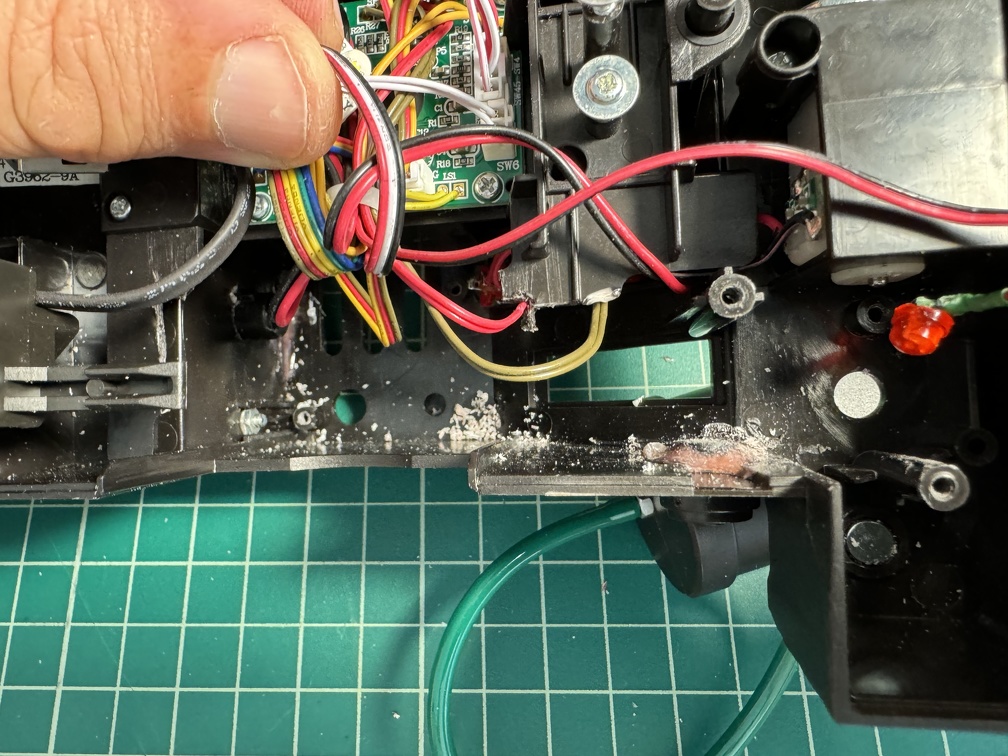
Removing the huge, one piece plate that holds the inserts into the top vents and the stock bar graph was ... not easy. Three screws down below, around the vent holes (I guess that's technically the top of the wand, but we work on it upside down) plus two LED boards that two of those screws hold in place (top panel LED and the interior light that shines up the vent holes), and then three more screws above (plus an LED that needs to be carefully lifted out), and then Hasbro apparently decided to use some sort of resin cement (aka pink goop of doom) on the side that was tough to scrape away before the part would finally come out.
See pink goop of doom, bottom center:
![Image]()
But I got it out, using a needle file to just scrape at it over and over until I got through:
![Image]()
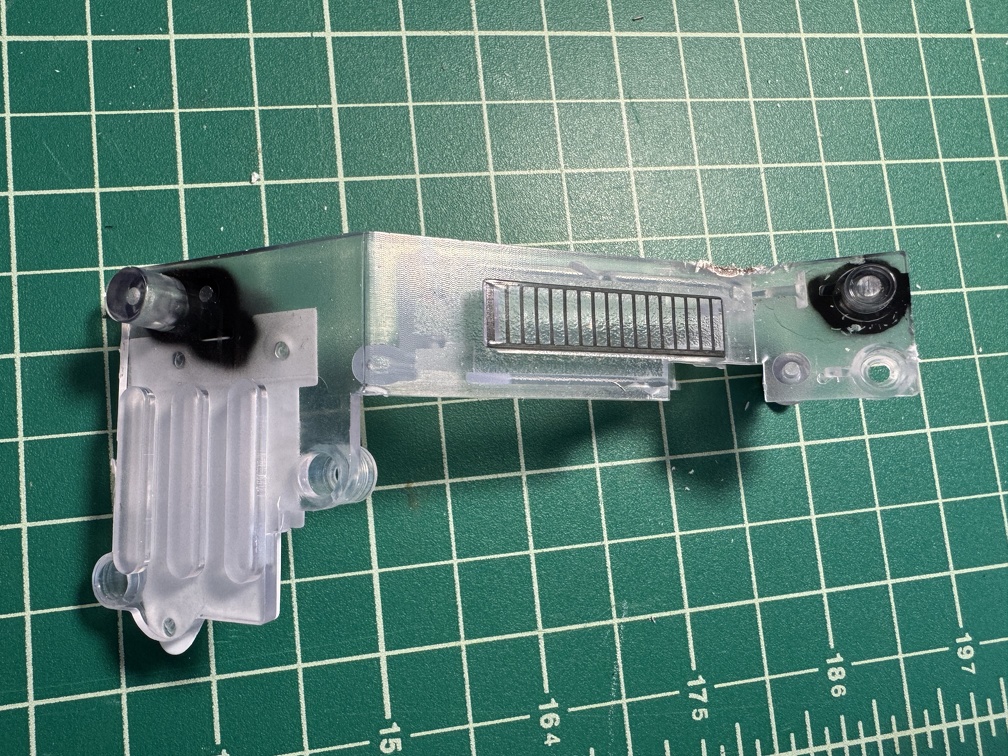
And finally the whole part was cleared and pulled free.
![Image]()
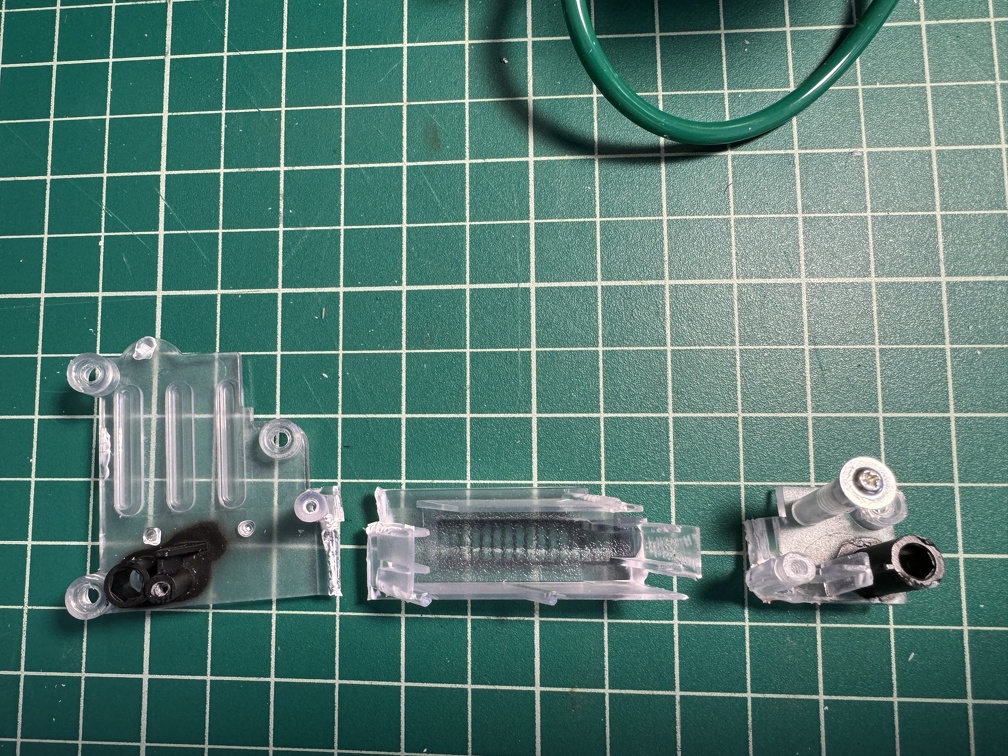
That part needs to be carefully cut into three pieces, retaining the right screw posts on each, so everything can be screwed back in properly, but the bargraph part comes out.
![Image]()
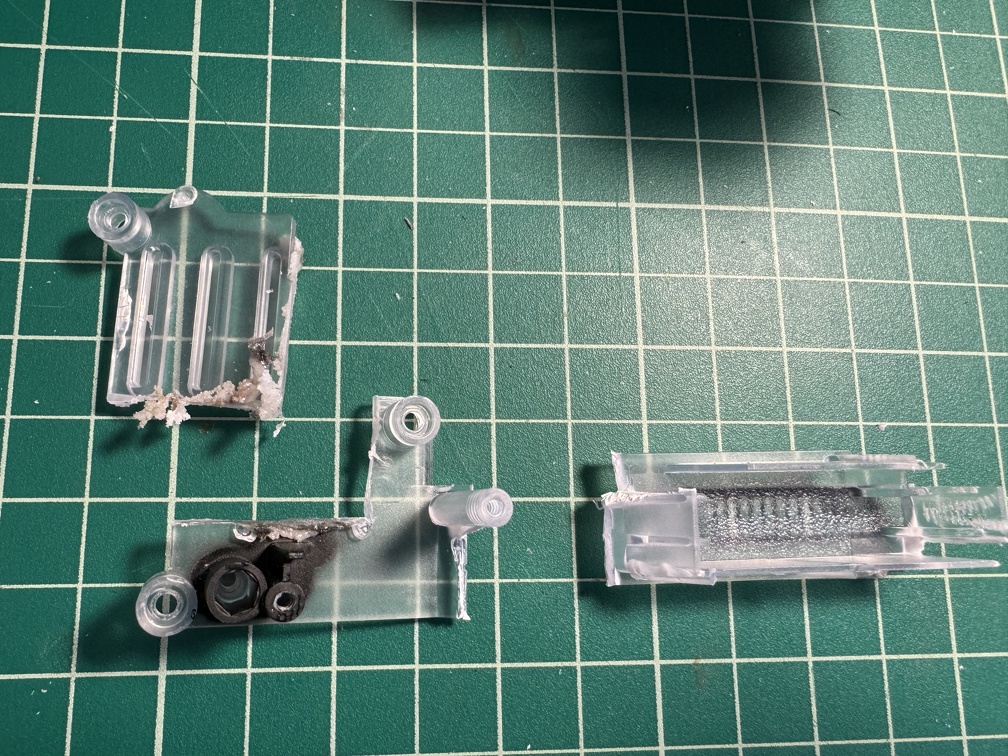
And for the vent plug delete, one of those pieces needs a further bit lopped off. I used flush cut nippers for most of the hacking, but this last bit needed a Dremel's cutting wheel to avoid cracking the plate wrong. But once that part was cut away, the vent is free and clear, moving forward.
![Image]()
The bottom and top screw clusters are added back in (note this clear panel uses shorter screws for connecting to the body, compared to all the other screws in this wand), and the vent plug deletion is now complete.
![Image]()
Next I'll install the bargraph in the middle, between the two replaced screw pads (for lack of a better term).
The 3D printed mount for the bargraph will sit inside like this, with the little arm placing a screw hole atop one of the screw posts in that top cluster. (Actually that's technically the lower cluster, with the slo blo LED mount, once everything is flipped over, but this is how we're looking at it.). I had to cut away a bit more of the bottom right corner of the clear plate in this photo, so the printed LED mount could sit correctly.
![Image]()
I removed the LED bargraph from the mount and put the clear mounting plate back in place, along with it's LED, etc, and then placed the 3D printed bracket. Flip it all over, and you can see the little edges of the bracket inside the stock bargraph LED slot. (The Frutto unit is a little smaller than the stock Hasbro parts, clearly). I had considered painting this piece, but considering the little sliver that's visible, and how smooth this part is (being the bottom of the print that was on the plate), I won't worry about that. For now, at least.
![Image]()
And in place inside:
![Image]()
Place the bargraph inside, and this part is done. Be sure it's in there right-side up! It's easy to get turned around, when you're working on the wand upside down. For the Frutto barograph, in the Hasbro wands, you want the edge of the little circuitboard attached to the LED's back to come close to the side wall, not pointing into the interior of the wand. I unfortunately don't have a good pic right now, but I'll edit one in later if I remember, next time I have the wand open.
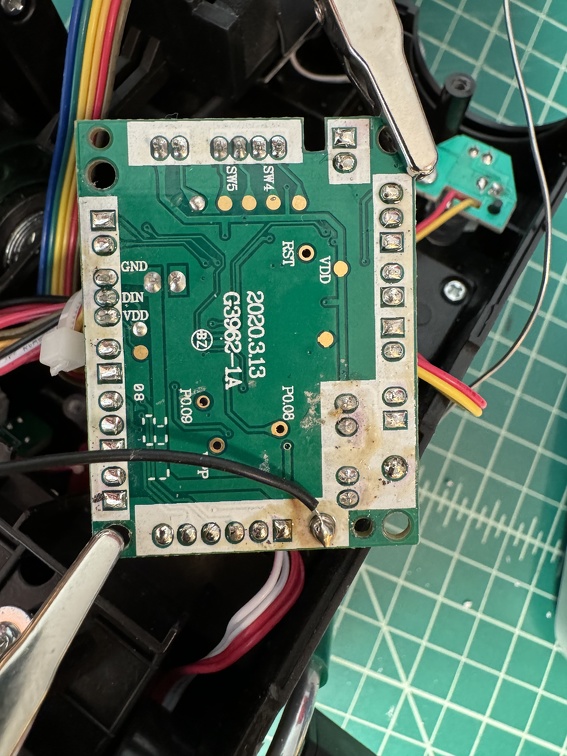
The one bit of soldering required by the Frutto LED is to attach a new ground wire to the back of the stock wand control board. Flip it over, and solder it to the back. (Pardon my un-cleaned flux). Note the new black wire. This new black wire will go to the screw mount wire block on the little sub-board that attaches to the bargraph via the two little ribbon cables. Also insert the rainbow wires cut from the old LED board, per the instructions on Frutto's site. (Also, connect those new JST ribbon cables... one of the sockets the each of the boards is marked SCL/SDA, so connect those two, and connect the unmarked pair)
![Image]()
![Image]()
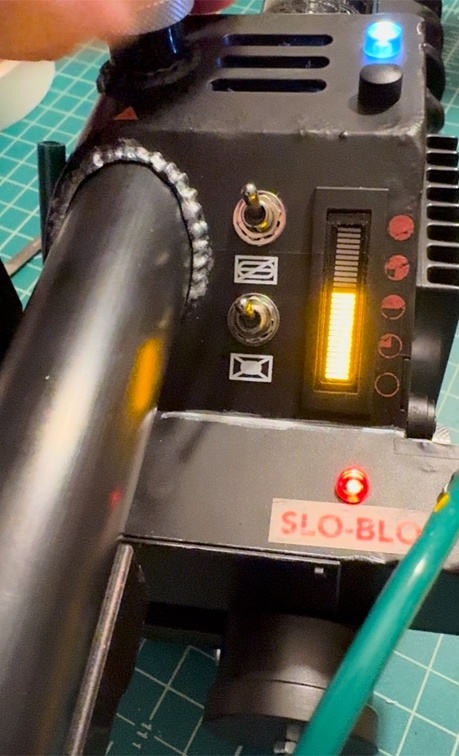
SUCCESS!
![Image]()
Mod #5: SpongeFace Wand Keep-Alive
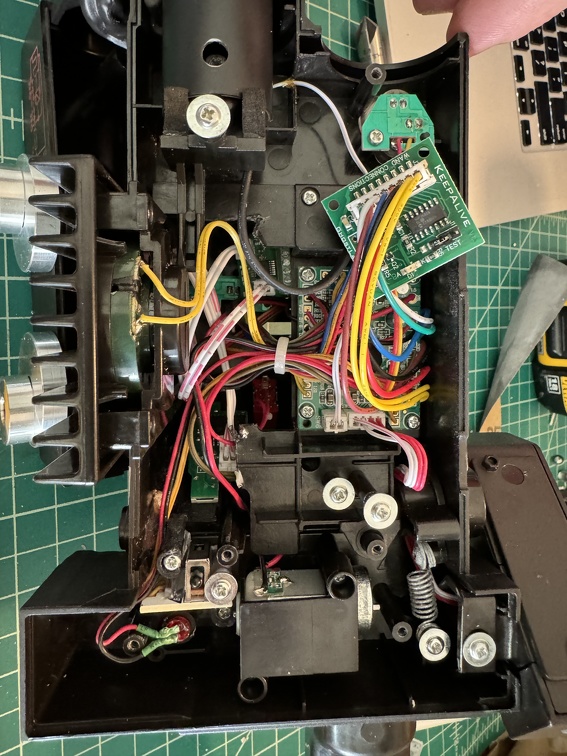
And for my last trick of the day, while I'm soldering things, next up is soldering the new wires to the back of the main board for my Spongeface Wand Keep-Alive. This is the newer version of the board, since a couple other people have confirmed it works with the NinjaTunes board in my pack. First test, though, is this standalone install.
Installation is pretty straightforward, yet not entirely "easy": Soldering 7 new wires to the back of the main board can be nerve-wracking. Fortunately that went fine, even though my soldering skills start to get a little shaky when we talk about more than connecting two wires, and start looking at PCBs. But I got them all on!
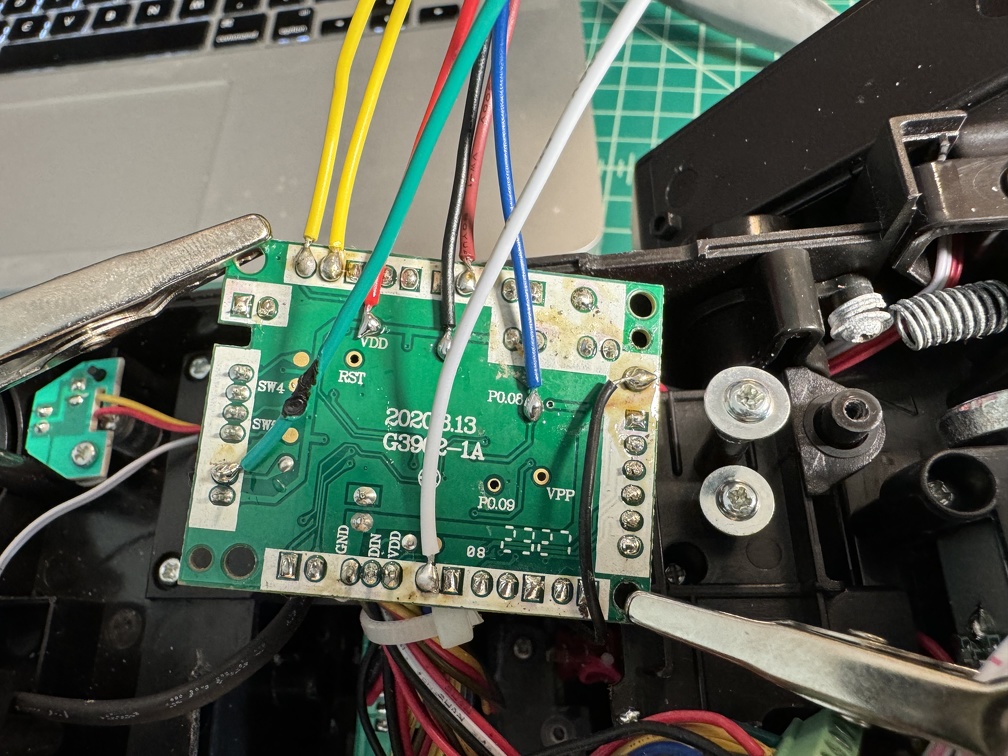
Check out all those new wires!
![Image]()
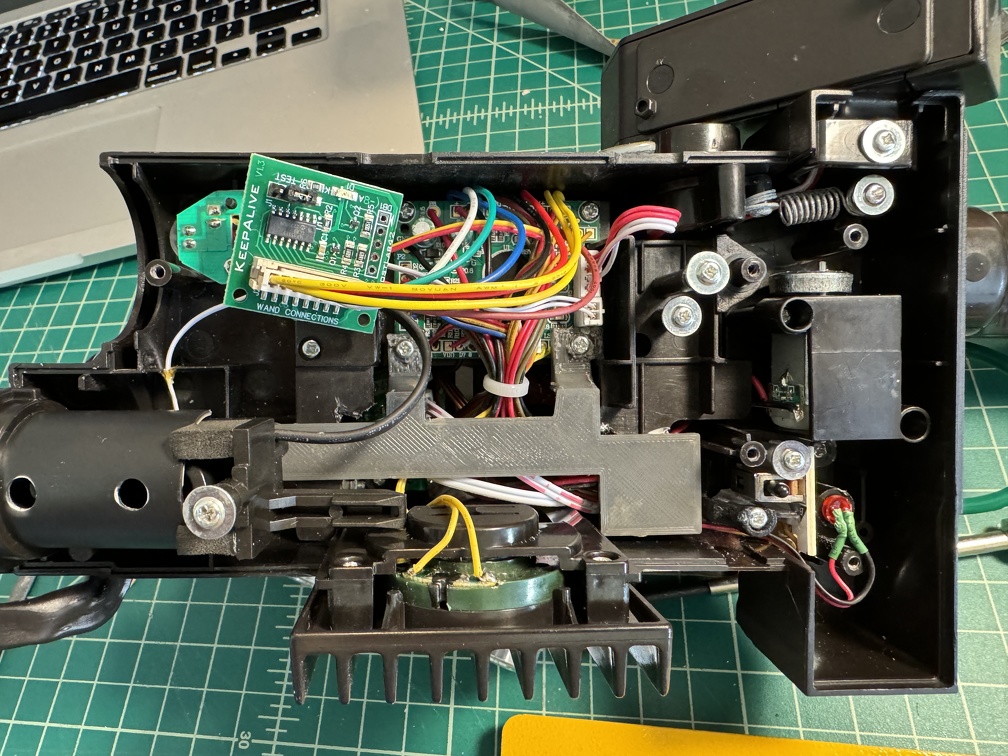
Once the wires are soldered on, you're good: The main board can be screwed back into place, and the plug can be inserted into Spongeface's add-on control board, and stuff should work.
![Image]()
Also, I added the new panel that takes the place of the plastic panel that was hacked away in the beginning of these mods, to keep the wire-filled area separate from the moving spring-loaded barrel assembly.
![Image]()
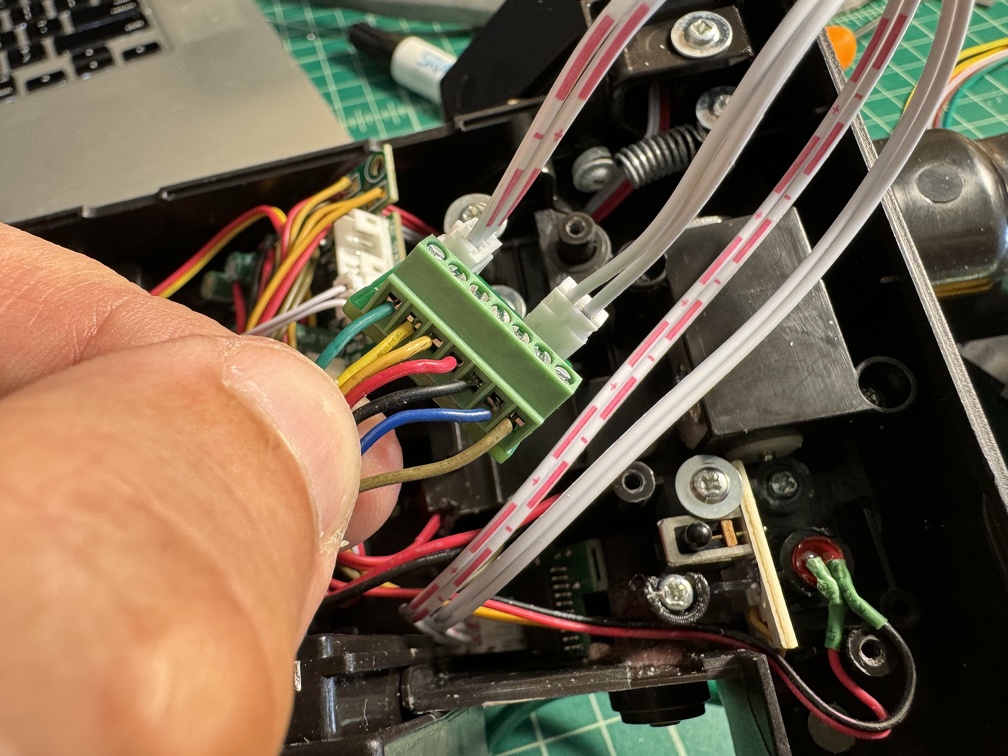
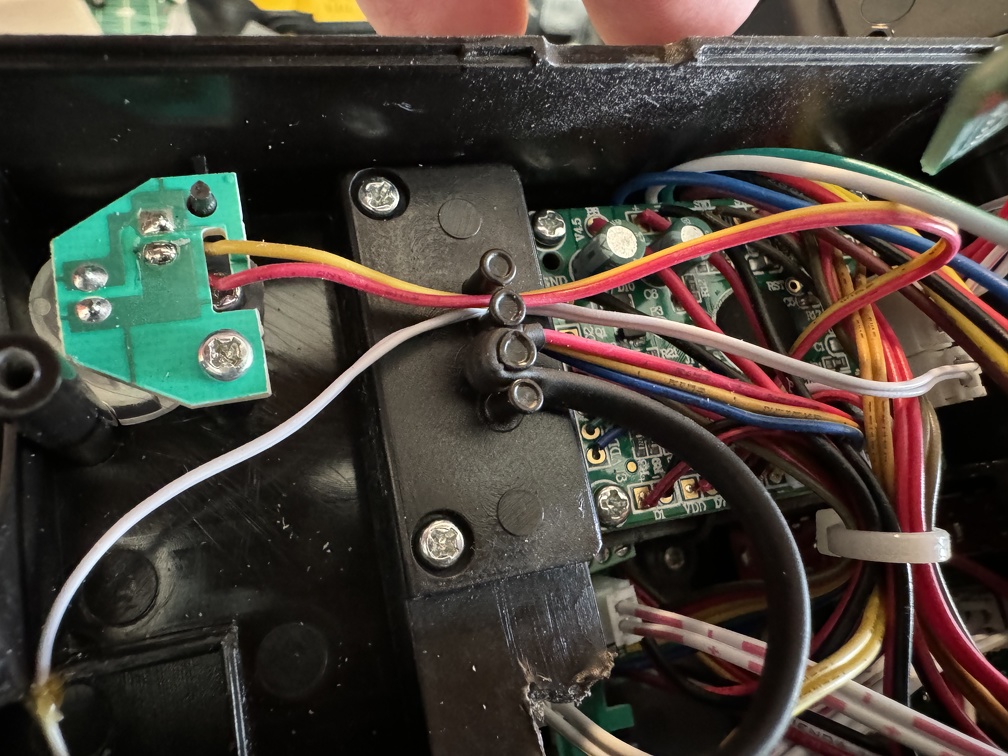
But now we run into a slight problem. The 84 wand has a slightly re-designed wiring block, compared to the prior wands. Those pegs now do a lovely job of protecting the moving barrel wires, compared to prior designs. BUT the 3D printed block provided by Spongeface that is supposed to mount on those pegs won't work anymore.
![Image]()
I'm reaching out to Spongeface for more permanent options. But for now, I just taped the little sub-board in place, and closed everything up. It'll do for now.
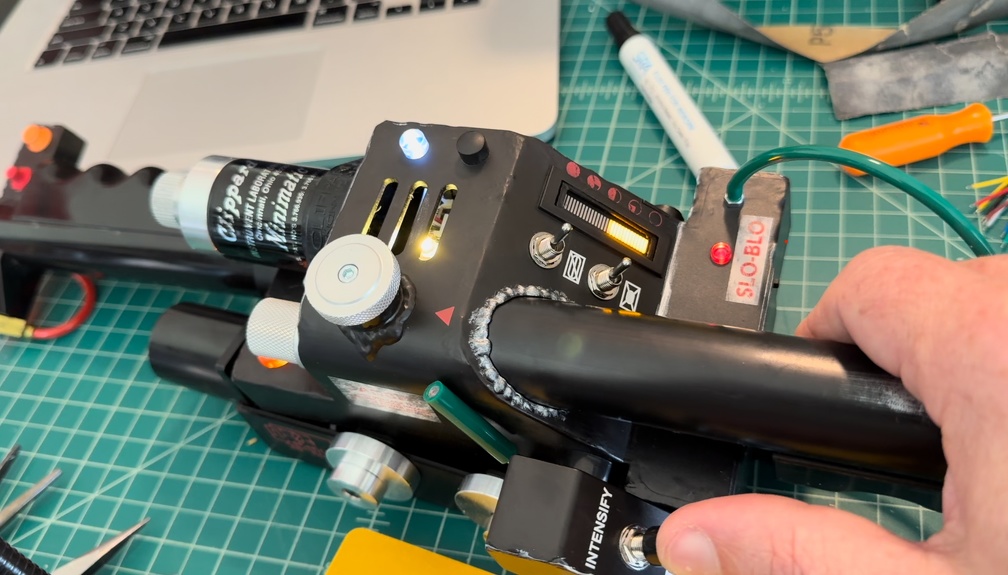
SO THAT'S THAT.
![Image]()
What's next?
More is planned. Painting and weathering, obviously, but I'm not there yet.
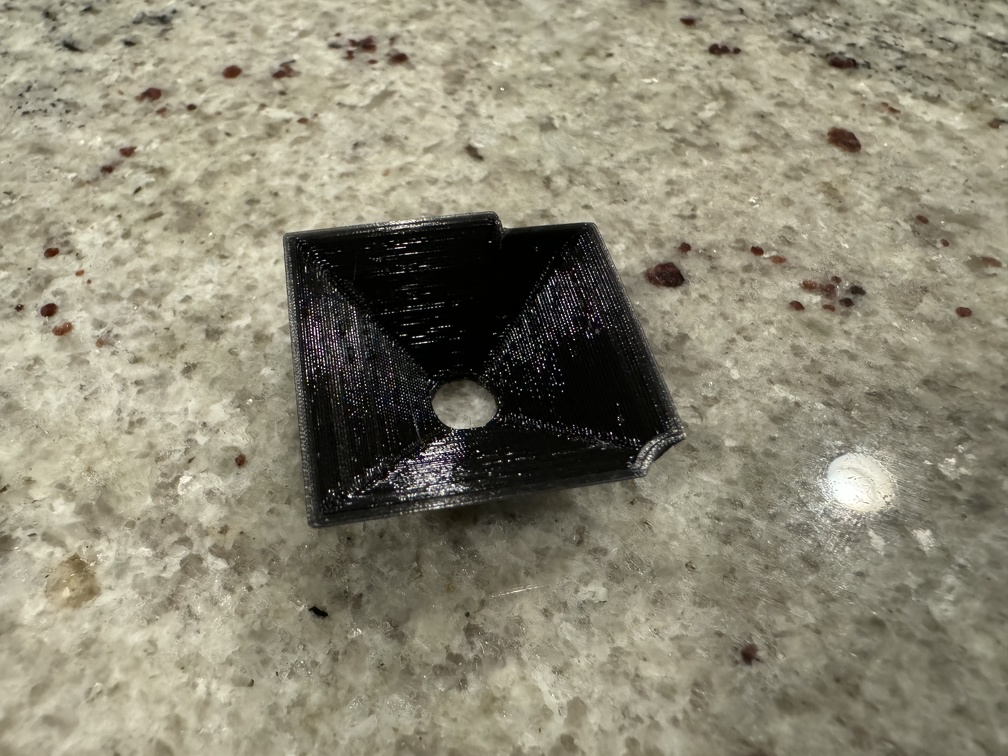
With the vent holes open, the stock LED inside is a little ugly looking, on the circuit board. Fortunately Dustin Grau designed a little insert that should help. I 3D printed it, and just need to line with aluminum to make it reflective (aluminum tape, or perhaps spray adhesive and aluminum foil), and it should fit right inside nicely.
![Image]()
I have a new perspex barrel coming, along with metal trigger and banjos, from Ben of Kent.
I need to install a real switch on the front ear of this 84 wand, like I did with the Afterlife one. (I have red ones, like the black one I used on the other wand) I'll do that a little differently this time, and use actual heat shrink tubing to cover it all, so I can actually make that switch the functional one, instead of the stock hat light switch.
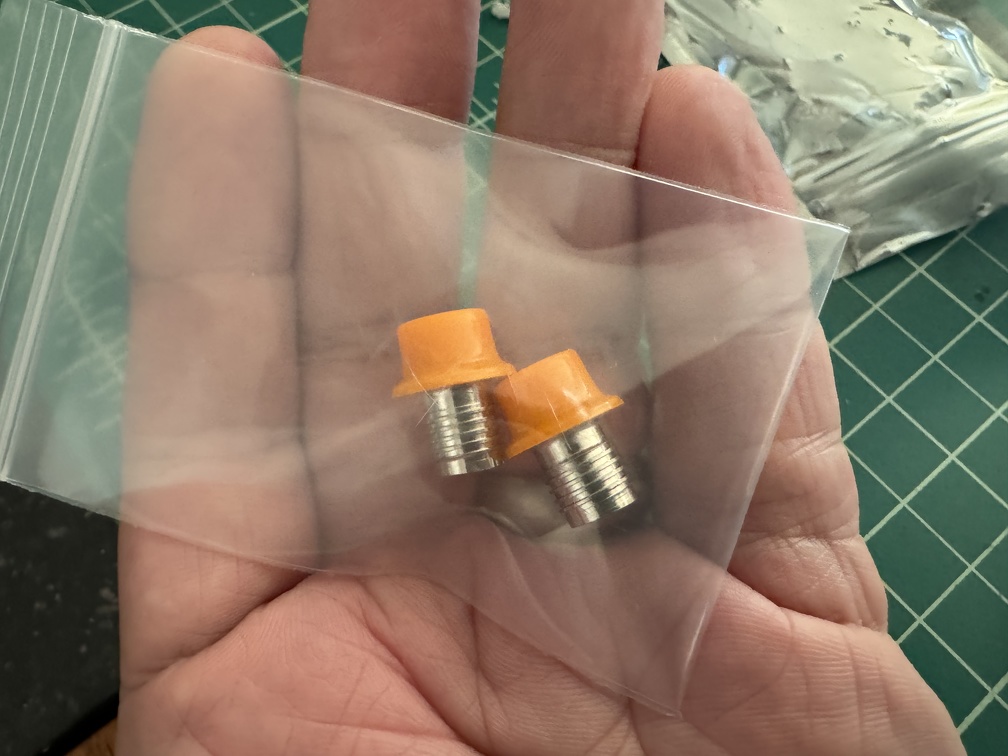
And at that point, it's time to put in real hat lights (which I picked up from GBFans) and get an LED into that.
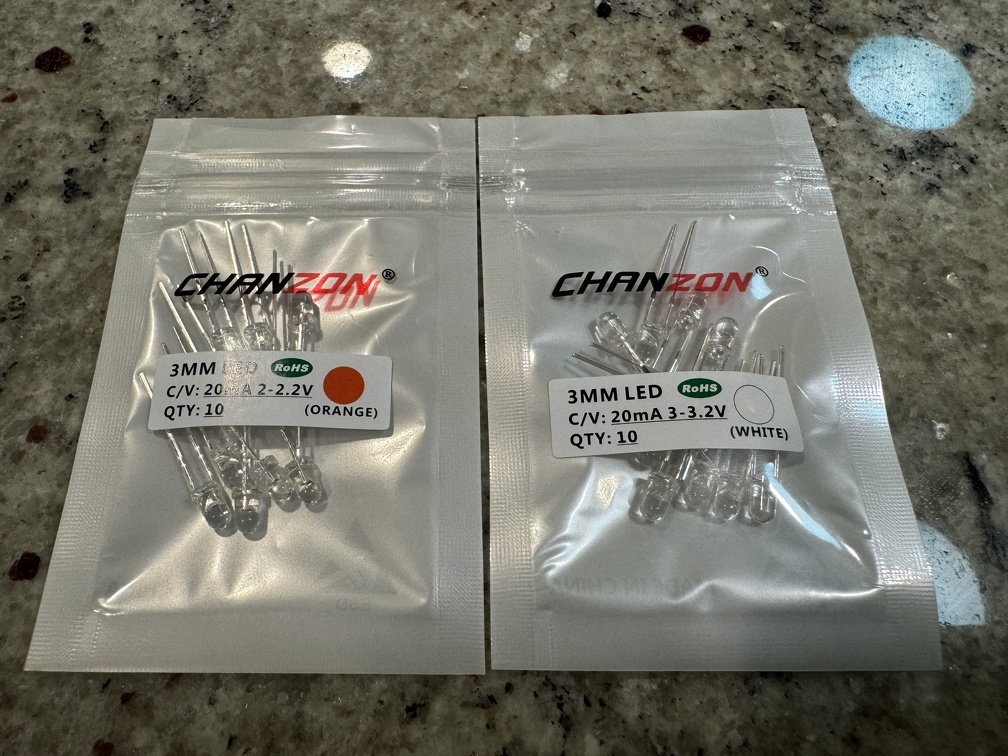
While I'm adding LEDs, the new black "hat light" on the main wand control box (UGH) needs to go, so I'll replace that, too. I know a cool mod using some new LEDs pulling off the slo blo LED (for the wand box) and the front Clippard area LED (for the front ear), so the two lights (four?) blink together in pairs. I have the new real hat lights in hand, along with the new LEDs:
![Image]()
![Image]()
So there's some fun mods still coming, for sure!
As a final thing, circling back to the pack for a minute. I usually have my pack displayed in the family room, but the time will come when I need to banish it to the garage, for a time, at least. Or travel a significant distance with it, involving more than tossing the bare back in the back seat.
While I understand the Pelican 1695 case is *perfect* for proton packs, I don't have that kind of budget. I was tipped off about a cheap Sterlite Footlocker at Walmart that fits, and found it on sale for $27... umm, yes, please!
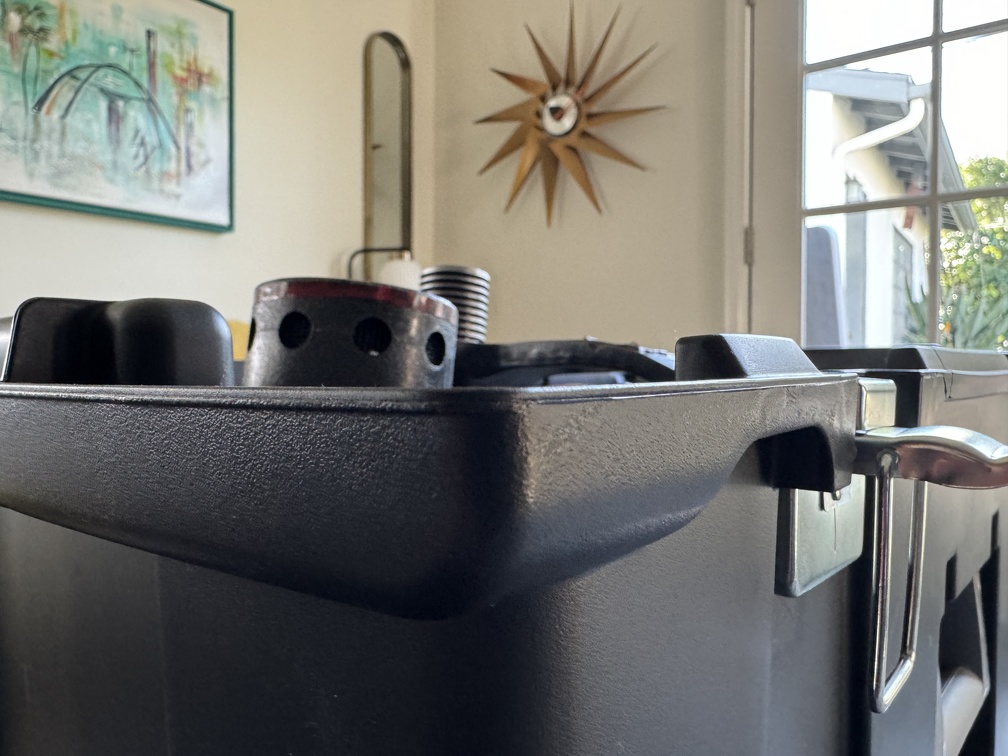
Unfortunately it's only *kind of* a perfect fit. The pack itself does fit inside:
![Image]()
... BUT with the Alice frame on it, it's an inch or two too tall to close the lid. (no, I'm not removing the Alice frame everytime I put it in the case)
![Image]()
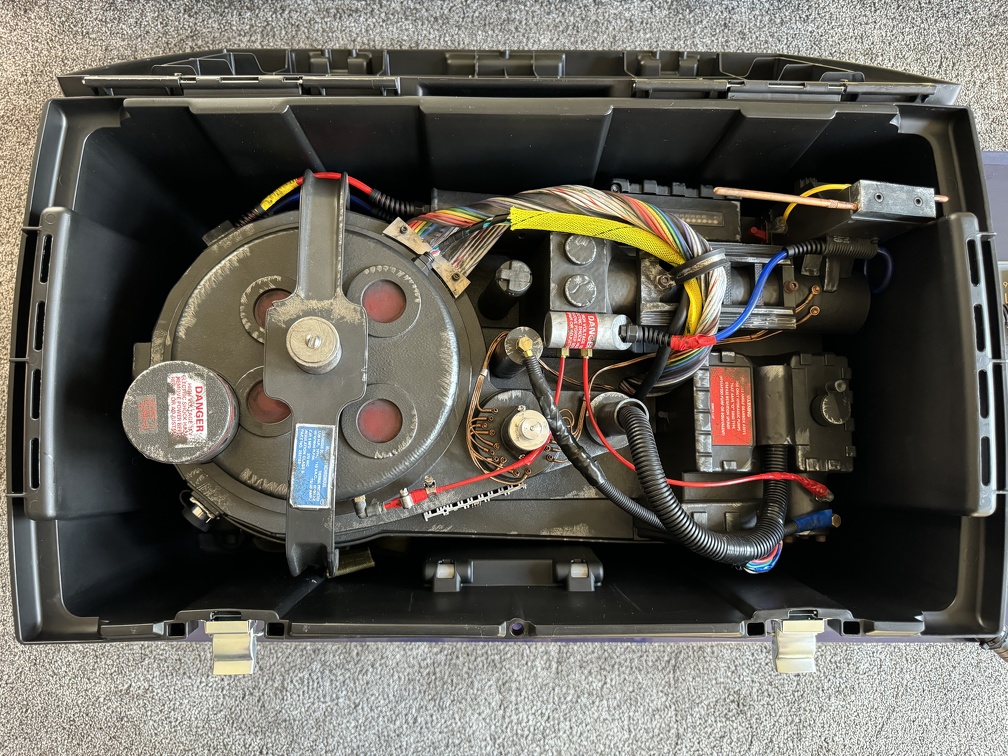
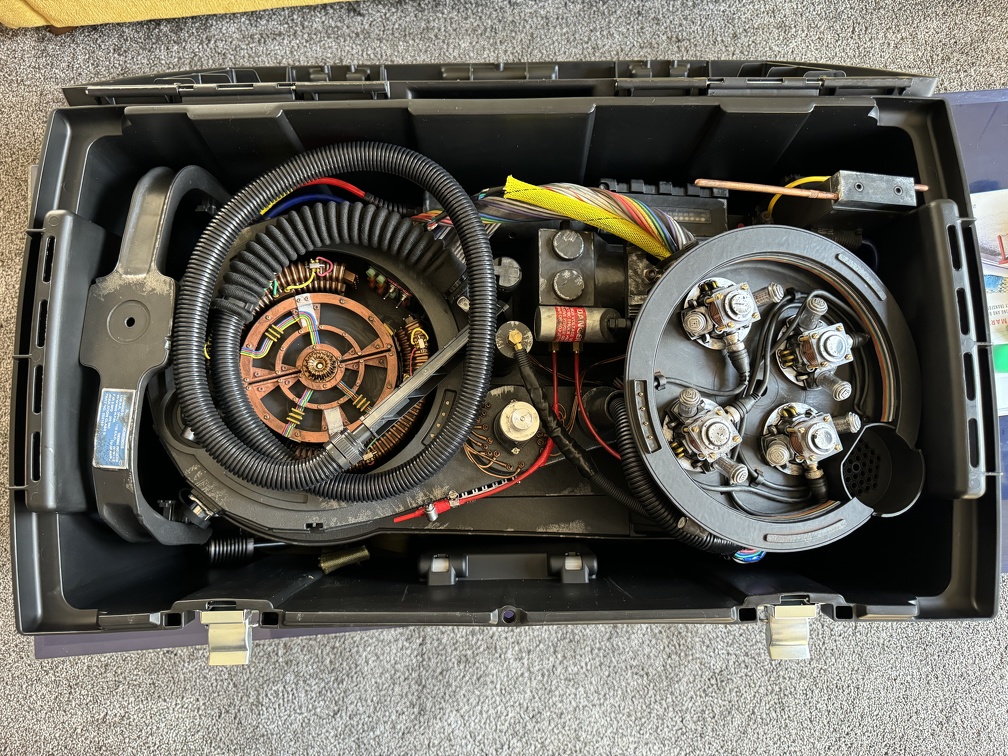
Fortunately, removing the bellows screw and bumper bar, and then flipping the cyclotron cover over DOES allow the case to close. The hose has to be detached, though.
![Image]()
Sharp eyes will notice that the wand is not inside. I haven't figured out if there's a way to squeeze that in, too, yet. Initial attempts have failed. BUT the wand is a lot smaller to deal with separately, if needed, so given the price, I'm reasonably satisfied for now. I just need to make the outside pretty, now...
We'll continue this, next time I return to this project. Hopefully this weekend, but we'll see.
Bust on, my brothers, sisters, and so on...
Time to start the REAL mods. Mega update, coming your way!
Hats off to Hasbro for having the cajones to ship the 84 wand inside a MUCH larger box, with the tape slit open (on the inner wand box, that is) and without a lick of padding inside the box. WTAF. Fortunately, everything seemed intact inside.
First, a couple shots of stock wand, for posterity:
Front:
Left Side:
Back:
Firing:
And some wand weight comparisons, since I posted this on FB and goodness knows that'll be impossible to find in 2 months (and not everyone is on FB):
84 Wand [100% stock]: 1 lb 13.2 oz
Spengler Wand (Gen 2 Orange Tip) [Mods: handle tape wrap, orange tip cutoff, 1 real pushbutton]: 1 lb 15.8 oz
Spengler Wand (Gen 1 Silver tip) [Mods: handle tape wrap]: 1 lb 15.6 oz
NO BATTERIES inside any of those, just the empty sleds.
I honestly suspect the 0.2 oz difference between the Spengler wands was mostly due to (a) the added hockey tape wrap, and (b) a small difference due to the weight of the different grips. I doubt that switch weights enough to matter.
Note for other comparisons: Three AA Duracell batteries weighs 2.5 oz in case someone compares these numbers to someone else's, that includes battery weight.
Mod #1: Paint
Mod #1, if you can call it that, was removing the godawful weathering Hasbro put on these wands. I get what they were going for, but wow, they must have outsourced and used the lowest bidder for the weathering this round. The brown handle weathering is utterly non-realistic and poorly adhered... it literally wipes off with zero effort using a paper tower and some isopropyl alcohol. You don't even need to wipe it hard, it comes right off. I think this stuff would come off on its own with just hand sweat, so I'm glad I removed it. I'll repaint that at some point.
The silver paint is adhered better... you have to rub it moderately hard to remove it with the same paper tower and isopropyl alcohol. But WOW the silver paint job is even worse than the brown, and that's saying something. Some "wear" on the edges is fine, but then they literally have straight silver paint lines in random places that look NOTHING like wear. (There's a nice looking wear mark on the back of the handle that is screen printed on... that's actually pretty nice. But everything else is astonishingly bad, compared to previous weathering jobs Hasbro has done.). Still, not too difficult to remove. Or just paint right over, your call.
Before:

After:

Mod #2: Metal Discs
Next, it was finally time to get inside. As many others have noted, this just involves drilling holes into the 5 capped screw hole covers on the bottom of the rail, and either hooking out the plugs, or just drilling them out entirely (carefully, don't hit the screw that's 1/4" inside under that plug!), and unscrewing them to remove the rail.
Then 4 screws (the barrel screw is way longer) and the bottom opens up, easy peasy, and you can finally see inside:
Now, one thing I forgot to document. There is a plastic plate underneath the barrel at the bottom of that pic, which keeps the wirey bits away from the slidey-slammy moving barrel bits. That gets cut away. Pretty simple, but you can't see it under the barrel in this pic, and I forgot to take a clear one with the barrel out of the way, showing the plastic, before and after I hacked it off with nippers. Plenty of videos on YT showing these teardowns if you want to see that happening.
One bit of warning: I unscrewed the stock controller board to move things out of the way, and started unplugging the cables that are plugged into connectors on the PCB. No problem, but BE CAREFUL: When removing the two wire connector that goes up the barrel (I assume to the switch in the front ear, or maybe to the tip LEDs?) the WHOLE SOCKET lifted clean off the board with the connector itself. Thankfully I was able to carefully push it right back into place, and everything still worked. But use extreme care when unplugging things.
(btw you can see some of the plastic separation plate that I later hacked away here, ref to a couple paragraphs up)
Moving on.
The two plastic side offset "knobs" are the first to go. VERY easy to replace, just unscrew the screw, and the disc/knob thing comes off the little plastic keyed tab that holds it in place. There's a plastic post that extends into the plastic knob a little bit which needs to be sanded flush, since it won't be extending into the metal disc, but then the metal part just screws onto the plastic tab, same as the original part did. Repeat for both of them, and you're done.
Plastic tab it too far from flush on the metal one:
The knurled disc on the other side of the wand is mostly the same, except the too-long post extends the opposite direction for the GBFans-provided screw to reach. A quick snip around with my flush cut snips to take a little off the end, and it screwed right in perfectly.
Mod #3: Clippard
Next up, the real Clippard R-701 valve install. Awesomely, the main pair of holes in the fake valve base actually line up nicely with the real base! Of course, the real valve has a round protrusion out the bottom center, with a keyed ridge molded in. Not a big deal to drill a hole in the middle, and use a needle file to cut a slot for the little keyed part, and it goes right on. Note when you're unscrewing the OEM valve, the nuts inside are only loosely held in place. If you're careful, you can probably keep them in place, and just screw right back into the same nuts. If you push even a little too hard, you'll pop them off and have to fish around in the depth of the wand to pull them out. (Ask me how I know LOL) Still, not too hard to get the real thing screwed in, and secure held by nuts on the inside.

Note slot holding nut in place (somewhat):
And that's done. SO PRETTY!!!
Mod #4: Frutto Tech Bargraph LED and Vent Hole Plate Removal
One of my most anticipated upgrades! I purchased Frutto's upgrade kit, and 3D printed the bracket as well as the replacement panel to protect the wiring from the wand extension mechanism.
(I just realized this pic was the first draft print of the LED bracket... the final bracket was from black PETG)
A quick test fit shows the plate seems to fit in there nicely, piggybacking off two of the mounting screws for the main board. (Release mechanism already removed, on the right side)
The bottom panel of the long rectangular box has to be opened as well, so the LEDs, switches, and top part of the whole bargraph/vent hole assembly can be accessed. (Side note, this is a good "after" shot showing what the interior looks like once that panel I mentioned above is trimmed away)

With the wand nicely laid open, popping the stock bargraph LED board out was straightforward. A little scary to cut through the wires going to that board... I wish they had used a connector!
Removing the huge, one piece plate that holds the inserts into the top vents and the stock bar graph was ... not easy. Three screws down below, around the vent holes (I guess that's technically the top of the wand, but we work on it upside down) plus two LED boards that two of those screws hold in place (top panel LED and the interior light that shines up the vent holes), and then three more screws above (plus an LED that needs to be carefully lifted out), and then Hasbro apparently decided to use some sort of resin cement (aka pink goop of doom) on the side that was tough to scrape away before the part would finally come out.
See pink goop of doom, bottom center:
But I got it out, using a needle file to just scrape at it over and over until I got through:
And finally the whole part was cleared and pulled free.
That part needs to be carefully cut into three pieces, retaining the right screw posts on each, so everything can be screwed back in properly, but the bargraph part comes out.
And for the vent plug delete, one of those pieces needs a further bit lopped off. I used flush cut nippers for most of the hacking, but this last bit needed a Dremel's cutting wheel to avoid cracking the plate wrong. But once that part was cut away, the vent is free and clear, moving forward.
The bottom and top screw clusters are added back in (note this clear panel uses shorter screws for connecting to the body, compared to all the other screws in this wand), and the vent plug deletion is now complete.
Next I'll install the bargraph in the middle, between the two replaced screw pads (for lack of a better term).
The 3D printed mount for the bargraph will sit inside like this, with the little arm placing a screw hole atop one of the screw posts in that top cluster. (Actually that's technically the lower cluster, with the slo blo LED mount, once everything is flipped over, but this is how we're looking at it.). I had to cut away a bit more of the bottom right corner of the clear plate in this photo, so the printed LED mount could sit correctly.
I removed the LED bargraph from the mount and put the clear mounting plate back in place, along with it's LED, etc, and then placed the 3D printed bracket. Flip it all over, and you can see the little edges of the bracket inside the stock bargraph LED slot. (The Frutto unit is a little smaller than the stock Hasbro parts, clearly). I had considered painting this piece, but considering the little sliver that's visible, and how smooth this part is (being the bottom of the print that was on the plate), I won't worry about that. For now, at least.
And in place inside:
Place the bargraph inside, and this part is done. Be sure it's in there right-side up! It's easy to get turned around, when you're working on the wand upside down. For the Frutto barograph, in the Hasbro wands, you want the edge of the little circuitboard attached to the LED's back to come close to the side wall, not pointing into the interior of the wand. I unfortunately don't have a good pic right now, but I'll edit one in later if I remember, next time I have the wand open.
The one bit of soldering required by the Frutto LED is to attach a new ground wire to the back of the stock wand control board. Flip it over, and solder it to the back. (Pardon my un-cleaned flux). Note the new black wire. This new black wire will go to the screw mount wire block on the little sub-board that attaches to the bargraph via the two little ribbon cables. Also insert the rainbow wires cut from the old LED board, per the instructions on Frutto's site. (Also, connect those new JST ribbon cables... one of the sockets the each of the boards is marked SCL/SDA, so connect those two, and connect the unmarked pair)
SUCCESS!
Mod #5: SpongeFace Wand Keep-Alive
And for my last trick of the day, while I'm soldering things, next up is soldering the new wires to the back of the main board for my Spongeface Wand Keep-Alive. This is the newer version of the board, since a couple other people have confirmed it works with the NinjaTunes board in my pack. First test, though, is this standalone install.
Installation is pretty straightforward, yet not entirely "easy": Soldering 7 new wires to the back of the main board can be nerve-wracking. Fortunately that went fine, even though my soldering skills start to get a little shaky when we talk about more than connecting two wires, and start looking at PCBs. But I got them all on!
Check out all those new wires!
Once the wires are soldered on, you're good: The main board can be screwed back into place, and the plug can be inserted into Spongeface's add-on control board, and stuff should work.
Also, I added the new panel that takes the place of the plastic panel that was hacked away in the beginning of these mods, to keep the wire-filled area separate from the moving spring-loaded barrel assembly.
But now we run into a slight problem. The 84 wand has a slightly re-designed wiring block, compared to the prior wands. Those pegs now do a lovely job of protecting the moving barrel wires, compared to prior designs. BUT the 3D printed block provided by Spongeface that is supposed to mount on those pegs won't work anymore.
I'm reaching out to Spongeface for more permanent options. But for now, I just taped the little sub-board in place, and closed everything up. It'll do for now.
SO THAT'S THAT.
What's next?
More is planned. Painting and weathering, obviously, but I'm not there yet.
With the vent holes open, the stock LED inside is a little ugly looking, on the circuit board. Fortunately Dustin Grau designed a little insert that should help. I 3D printed it, and just need to line with aluminum to make it reflective (aluminum tape, or perhaps spray adhesive and aluminum foil), and it should fit right inside nicely.
I have a new perspex barrel coming, along with metal trigger and banjos, from Ben of Kent.
I need to install a real switch on the front ear of this 84 wand, like I did with the Afterlife one. (I have red ones, like the black one I used on the other wand) I'll do that a little differently this time, and use actual heat shrink tubing to cover it all, so I can actually make that switch the functional one, instead of the stock hat light switch.
And at that point, it's time to put in real hat lights (which I picked up from GBFans) and get an LED into that.
While I'm adding LEDs, the new black "hat light" on the main wand control box (UGH) needs to go, so I'll replace that, too. I know a cool mod using some new LEDs pulling off the slo blo LED (for the wand box) and the front Clippard area LED (for the front ear), so the two lights (four?) blink together in pairs. I have the new real hat lights in hand, along with the new LEDs:
So there's some fun mods still coming, for sure!
As a final thing, circling back to the pack for a minute. I usually have my pack displayed in the family room, but the time will come when I need to banish it to the garage, for a time, at least. Or travel a significant distance with it, involving more than tossing the bare back in the back seat.
While I understand the Pelican 1695 case is *perfect* for proton packs, I don't have that kind of budget. I was tipped off about a cheap Sterlite Footlocker at Walmart that fits, and found it on sale for $27... umm, yes, please!
Unfortunately it's only *kind of* a perfect fit. The pack itself does fit inside:
... BUT with the Alice frame on it, it's an inch or two too tall to close the lid. (no, I'm not removing the Alice frame everytime I put it in the case)
Fortunately, removing the bellows screw and bumper bar, and then flipping the cyclotron cover over DOES allow the case to close. The hose has to be detached, though.
Sharp eyes will notice that the wand is not inside. I haven't figured out if there's a way to squeeze that in, too, yet. Initial attempts have failed. BUT the wand is a lot smaller to deal with separately, if needed, so given the price, I'm reasonably satisfied for now. I just need to make the outside pretty, now...
We'll continue this, next time I return to this project. Hopefully this weekend, but we'll see.
Bust on, my brothers, sisters, and so on...
Statistics: Posted by kman — February 15th, 2024, 8:08 pm